While planets are the best way to use Urbit long-term for most, stars are the best way to take an ownership stake in the network itself.
If a planet is a plot of digital land, think of a star as a province or city-state. It can issue planets and perform a variety of specific network functions, making it a unique asset.
Stars as an Asset
Learn what makes stars a unique investment opportunity
Buying a Star
Learn how to purchase a star from an Urbit marketplace
Selling a Star
Learn how to sell a star through an Urbit marketplace
What is a star?
A star is an NFT, just like a punk or an ape–except instead of it just being an interesting picture, it can mint tens of thousands of new NFTs called planets which function as unique identities.
Billions of planets can be minted, but only 65,355 stars.
Stars don’t only mint planets, but sponsor them as well. This means that stars provide routing services — like an internet service provider for their planets, who are free to join and leave stars as they please.
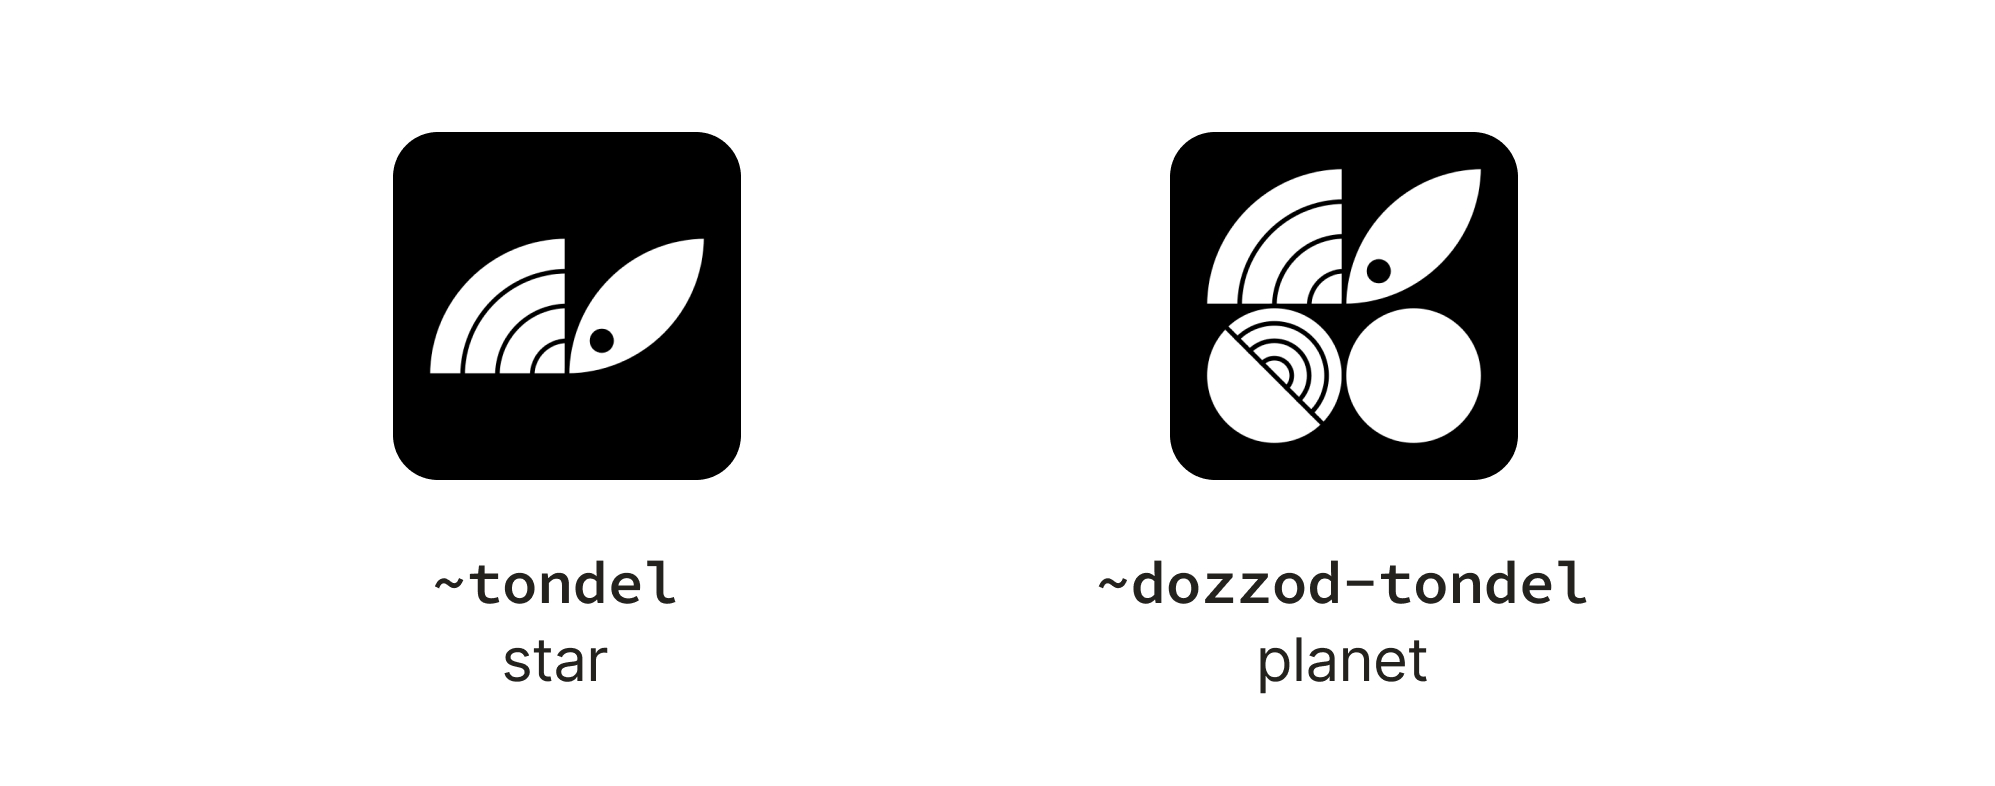
Stars are legibly and visually distinguishable by their names and sigils, which contain only two phonemes compared to a planet’s four.
Why is a star valuable?
Stars make it easy to sell planets. Even if you were to sell planets for just $1, that’s a potential $65,535 in planets alone.
But beyond the value of the planets as network space, a star has the potential to become a locus of community. A community consists of the planets issued by the star and the software that they run. When you own a star you can practically host a standalone network; all of your child planets only go through you for routing. It's a natural choice for a company, an organization, or a city-state.
Not only do stars deliver kernel updates, they’re a natural source for custom software. Stars are positioned so that they can decide to only share features with the planets they sponsor. Stars could also host bolt-on services like the bitcoin wallet or machine learning that are better suited to run on dedicated servers optimized for those functions.
Keep in mind that while stars are positioned to serve as this type of infrastructure, the demand and the tools for these type of functions are yet to come.
What is the best way to get a star?
We recommend Urbitex, a marketplace dedicated to Urbit address space. Read our guide to buying a star with Urbitex.
1. Get Ethereum on a Metamask wallet
Urbitex only supports Metamask, so you’ll need to set it up with a browser extension. Read a tutorial on how to do this.
We recommend using Metamask with a hardware wallet like Ledger or Trezor for storing high value NFTs like stars.
2. Connect your wallet to Urbitex
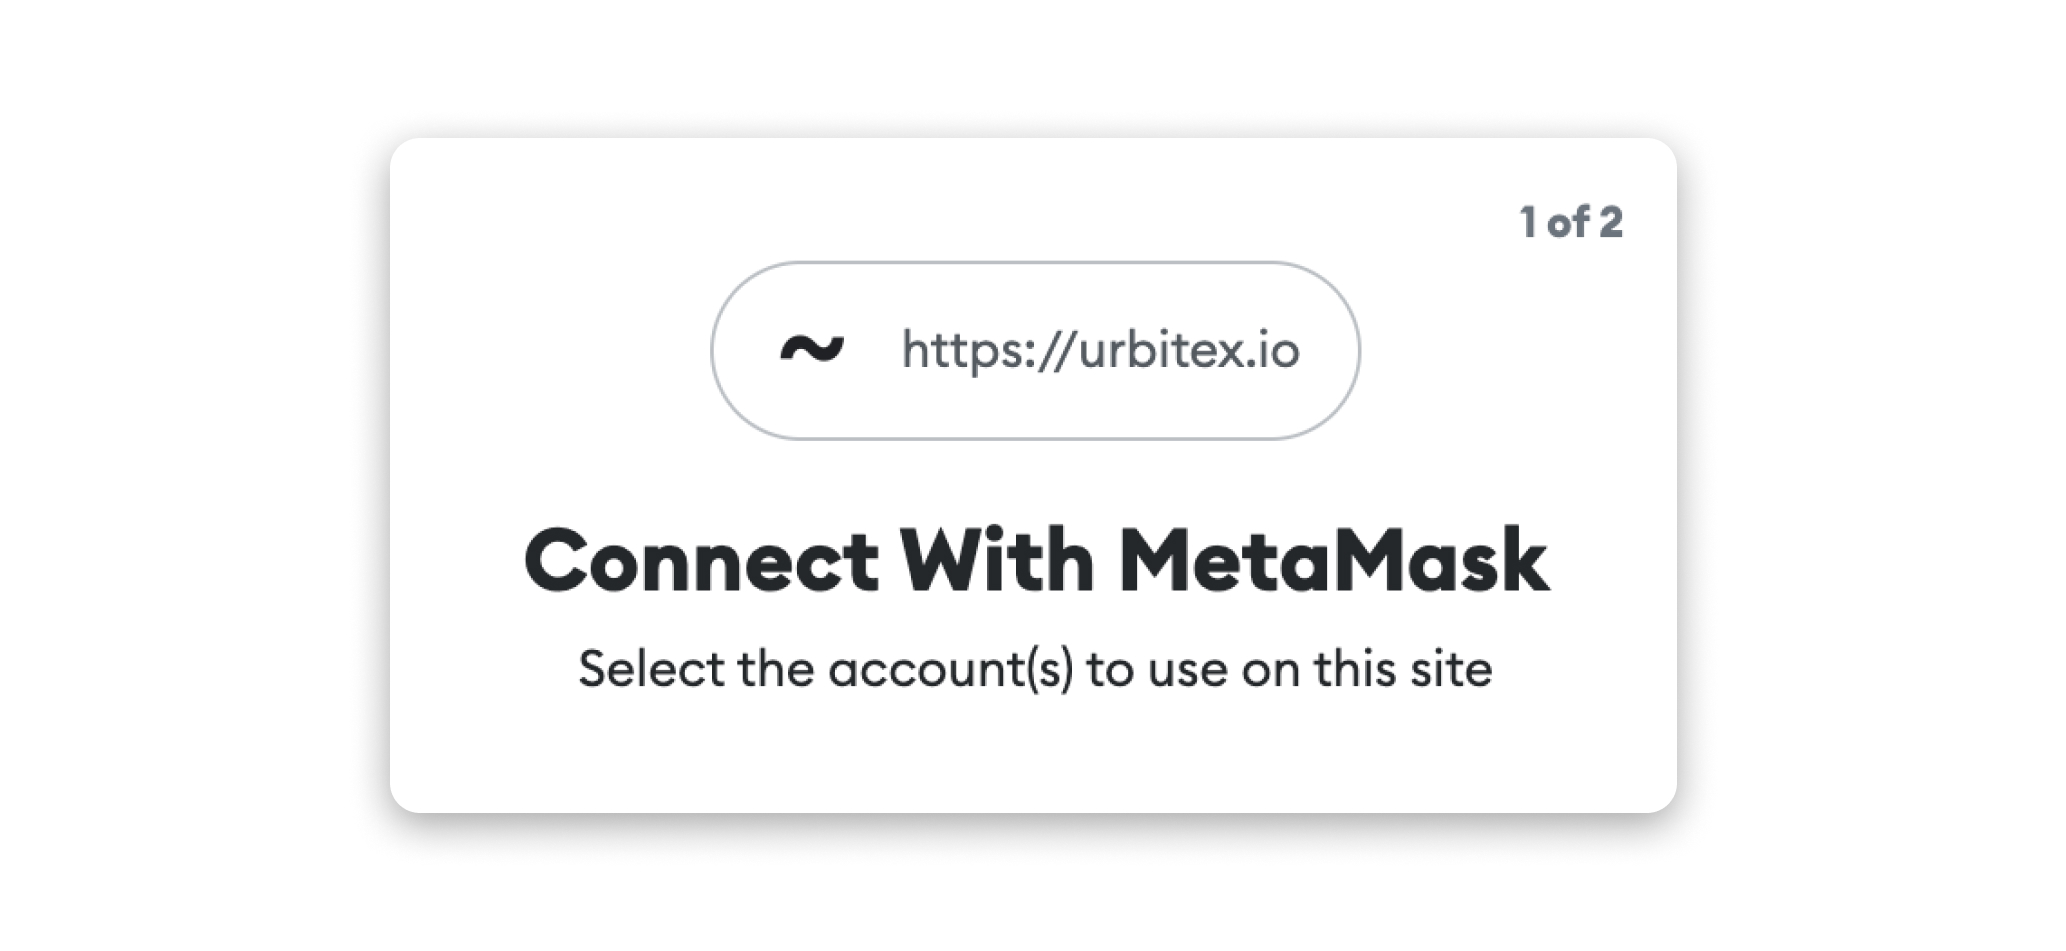
Point your browser to urbitex.io, and click wallet in the upper right corner. This will open your Metamask browser extension and prompt you to connect your wallet. Confirm which account you wish to connect, and continue.
3. Check out the stars
Point your browser to the Urbitex home page, and click on the “Star” button in the asset types section of the left column.
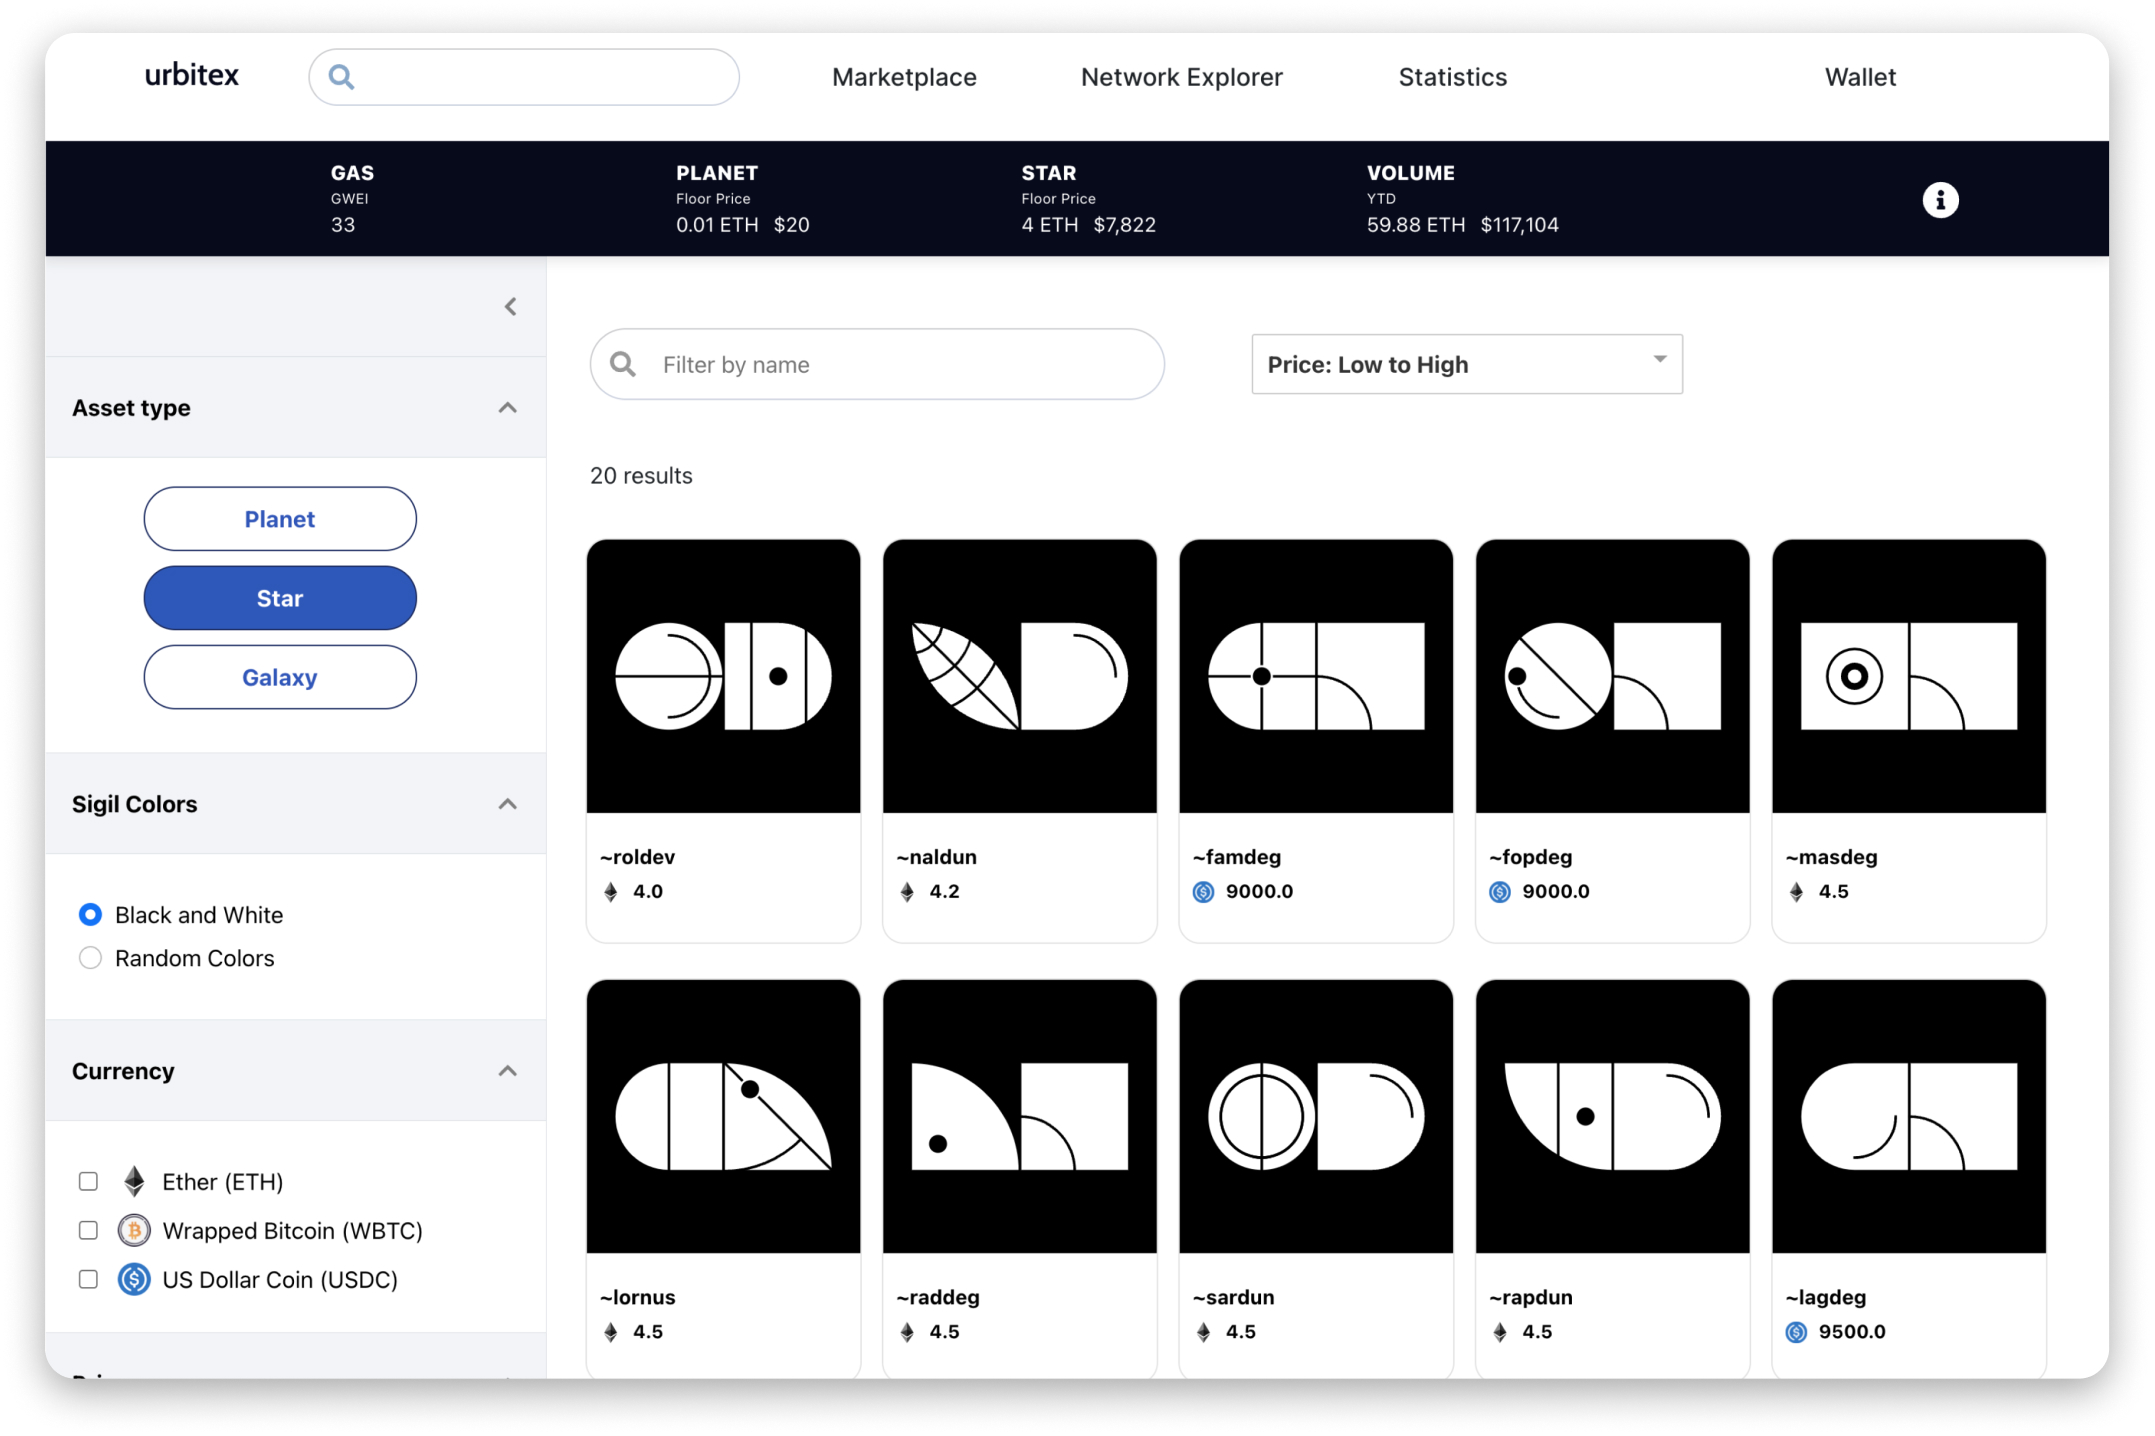
Here you’ll see the star inventory. Let’s select one to check out.
4. Select a star
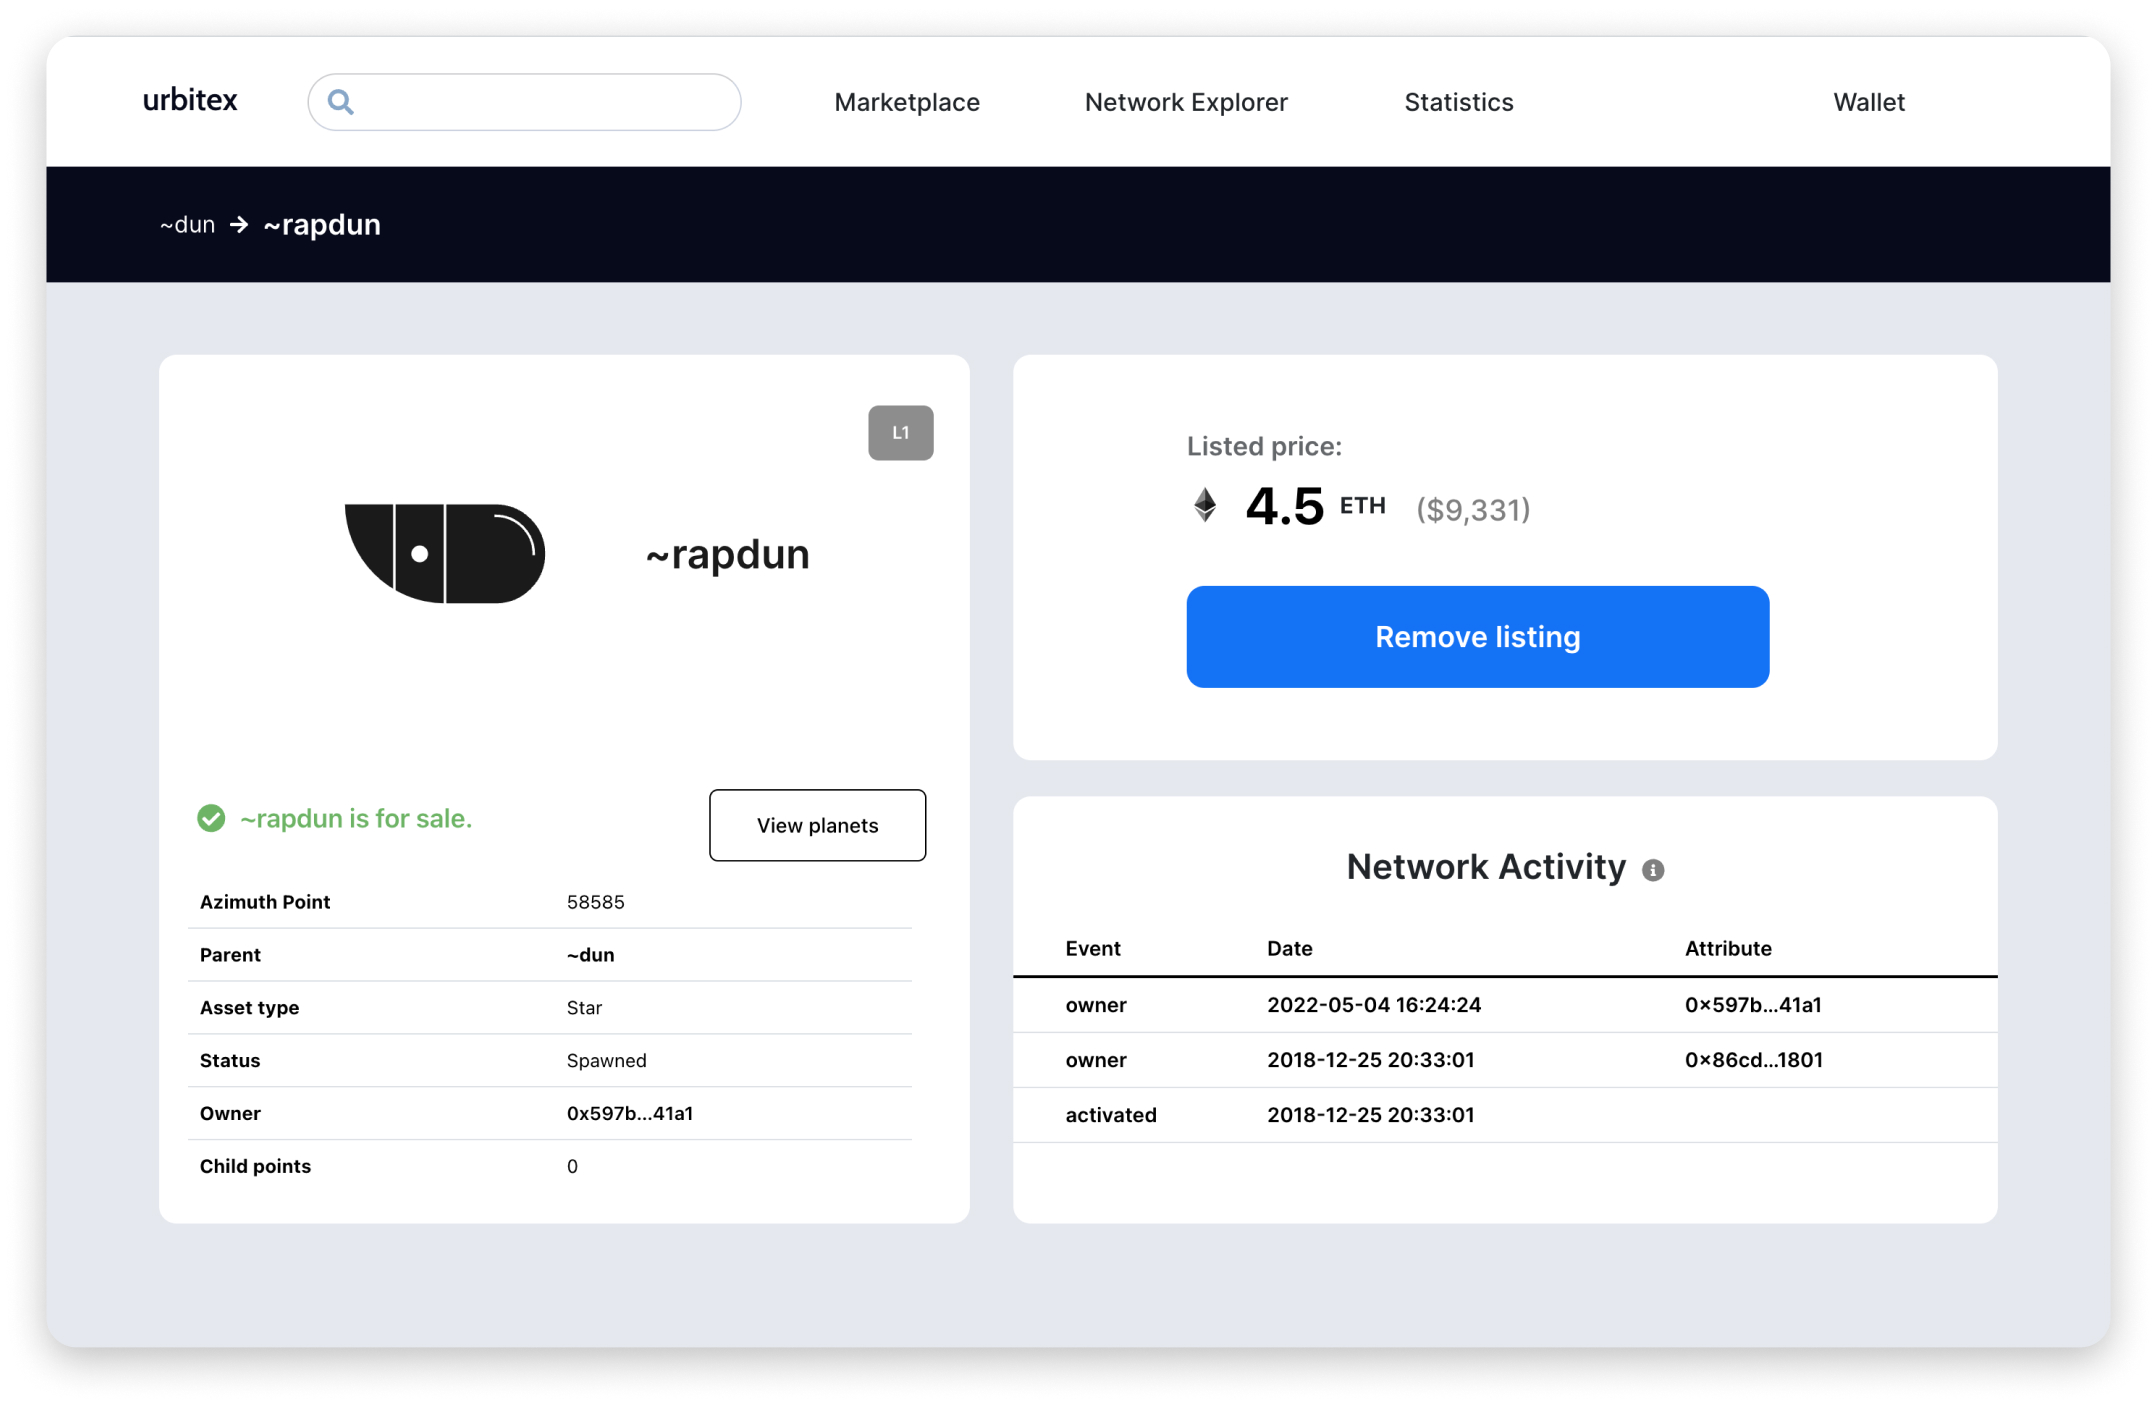
Click on “~rapdun” to view the star page.
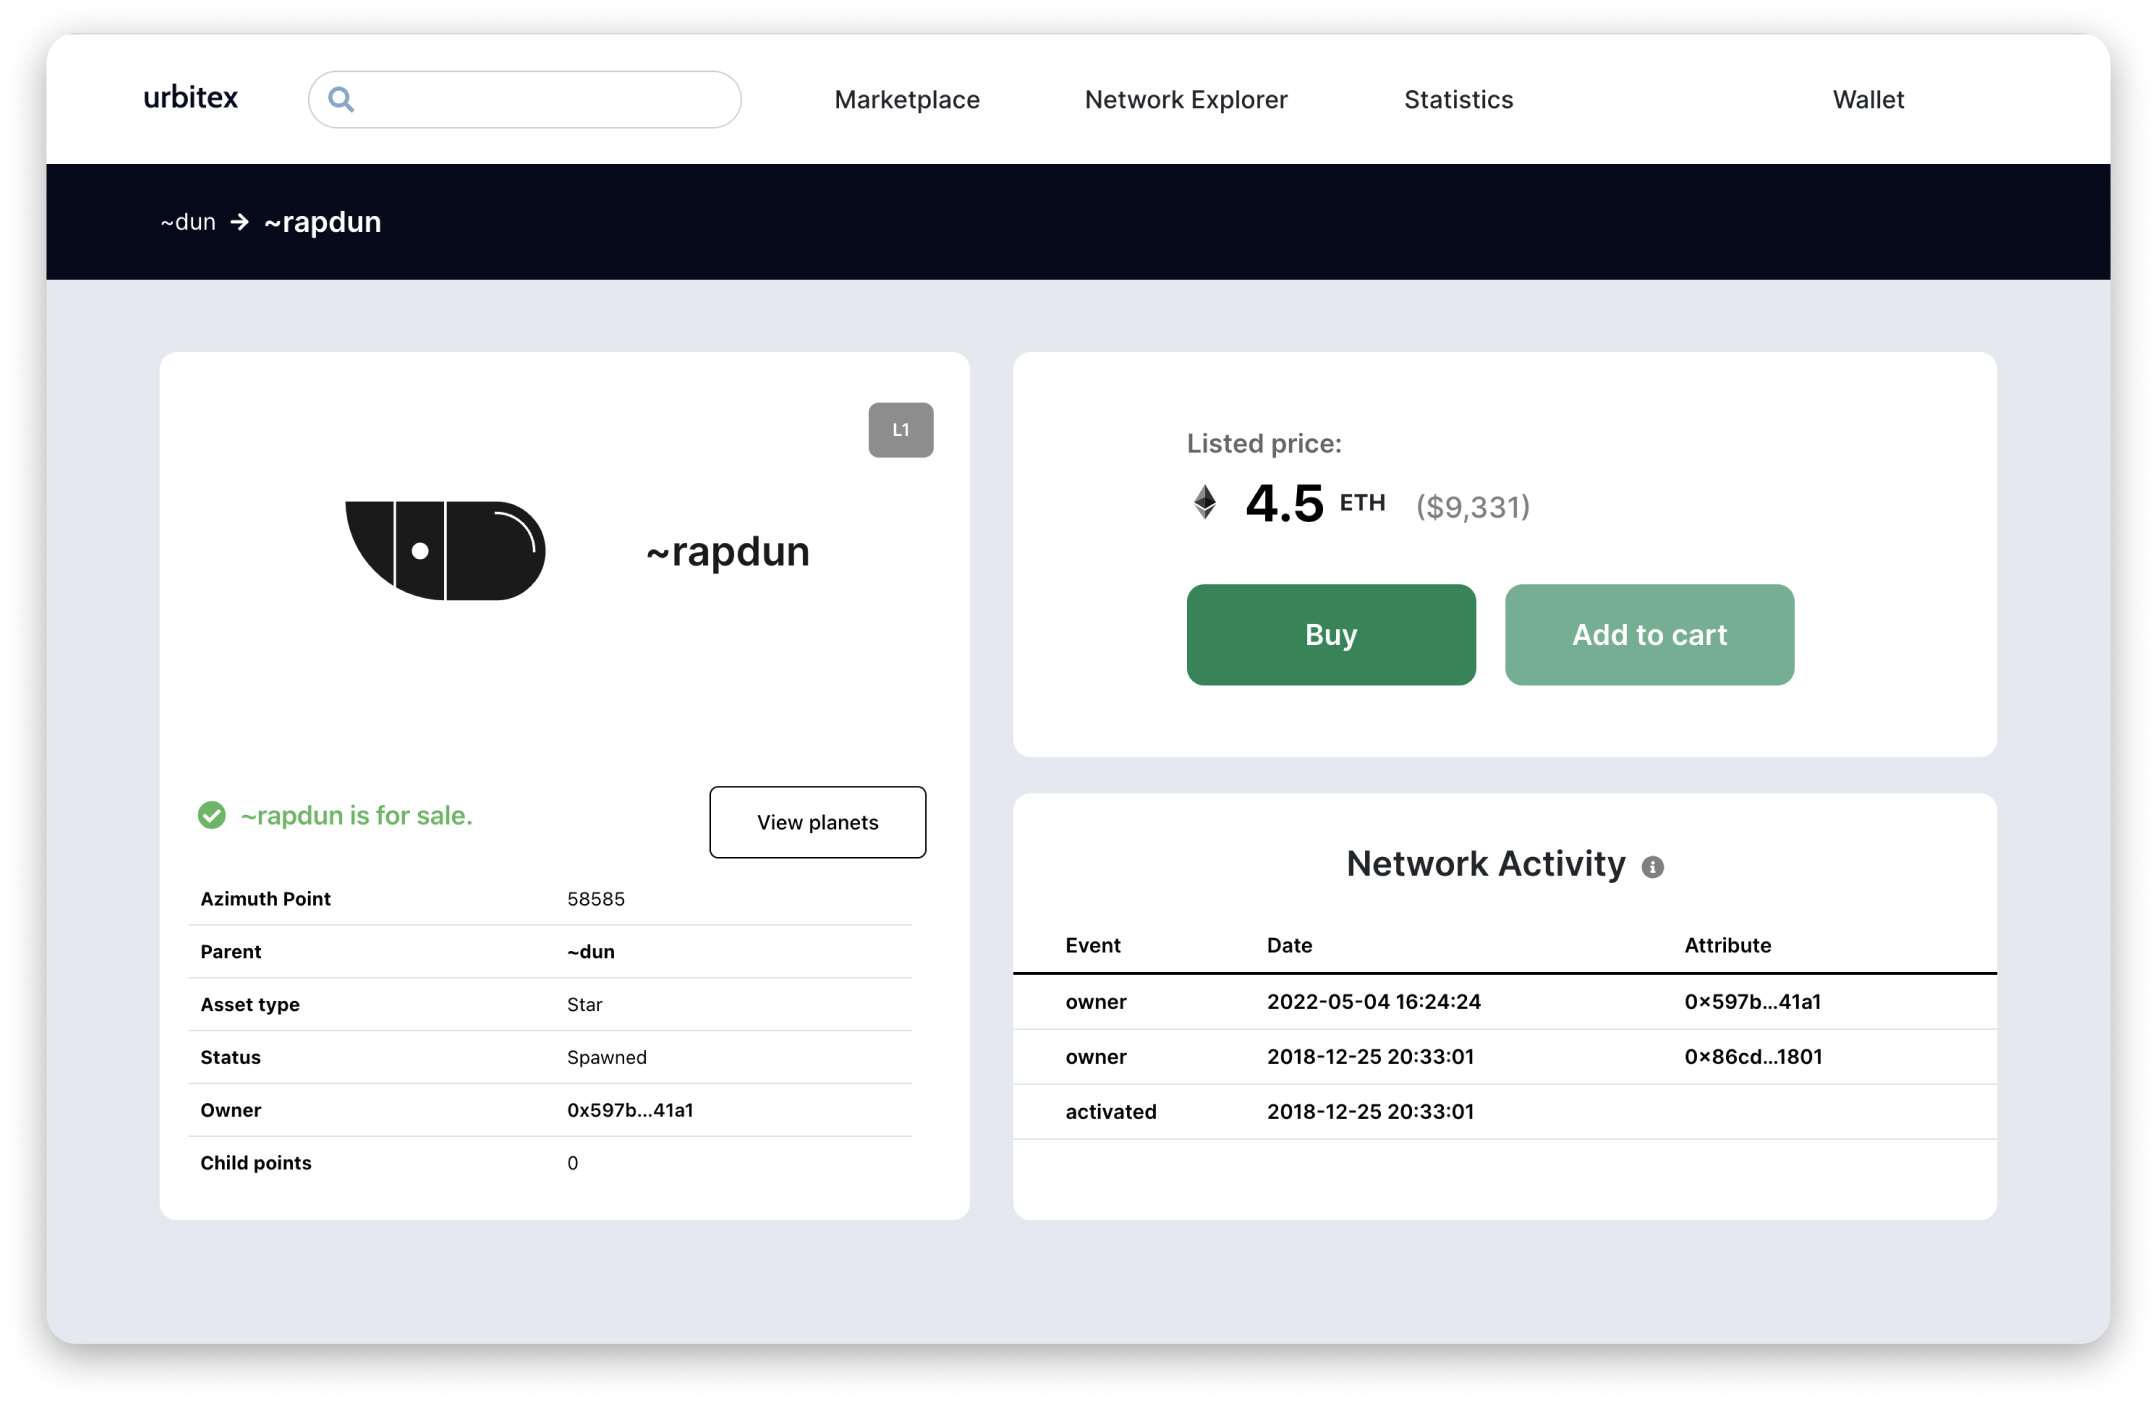
Here we’ll see the relevant information, like the purchase history, owner address, and of course the price.
5. Buying the star
Click the “Buy” button on the star page, and then click “OK” on the notice regarding gas fees through Metamask.
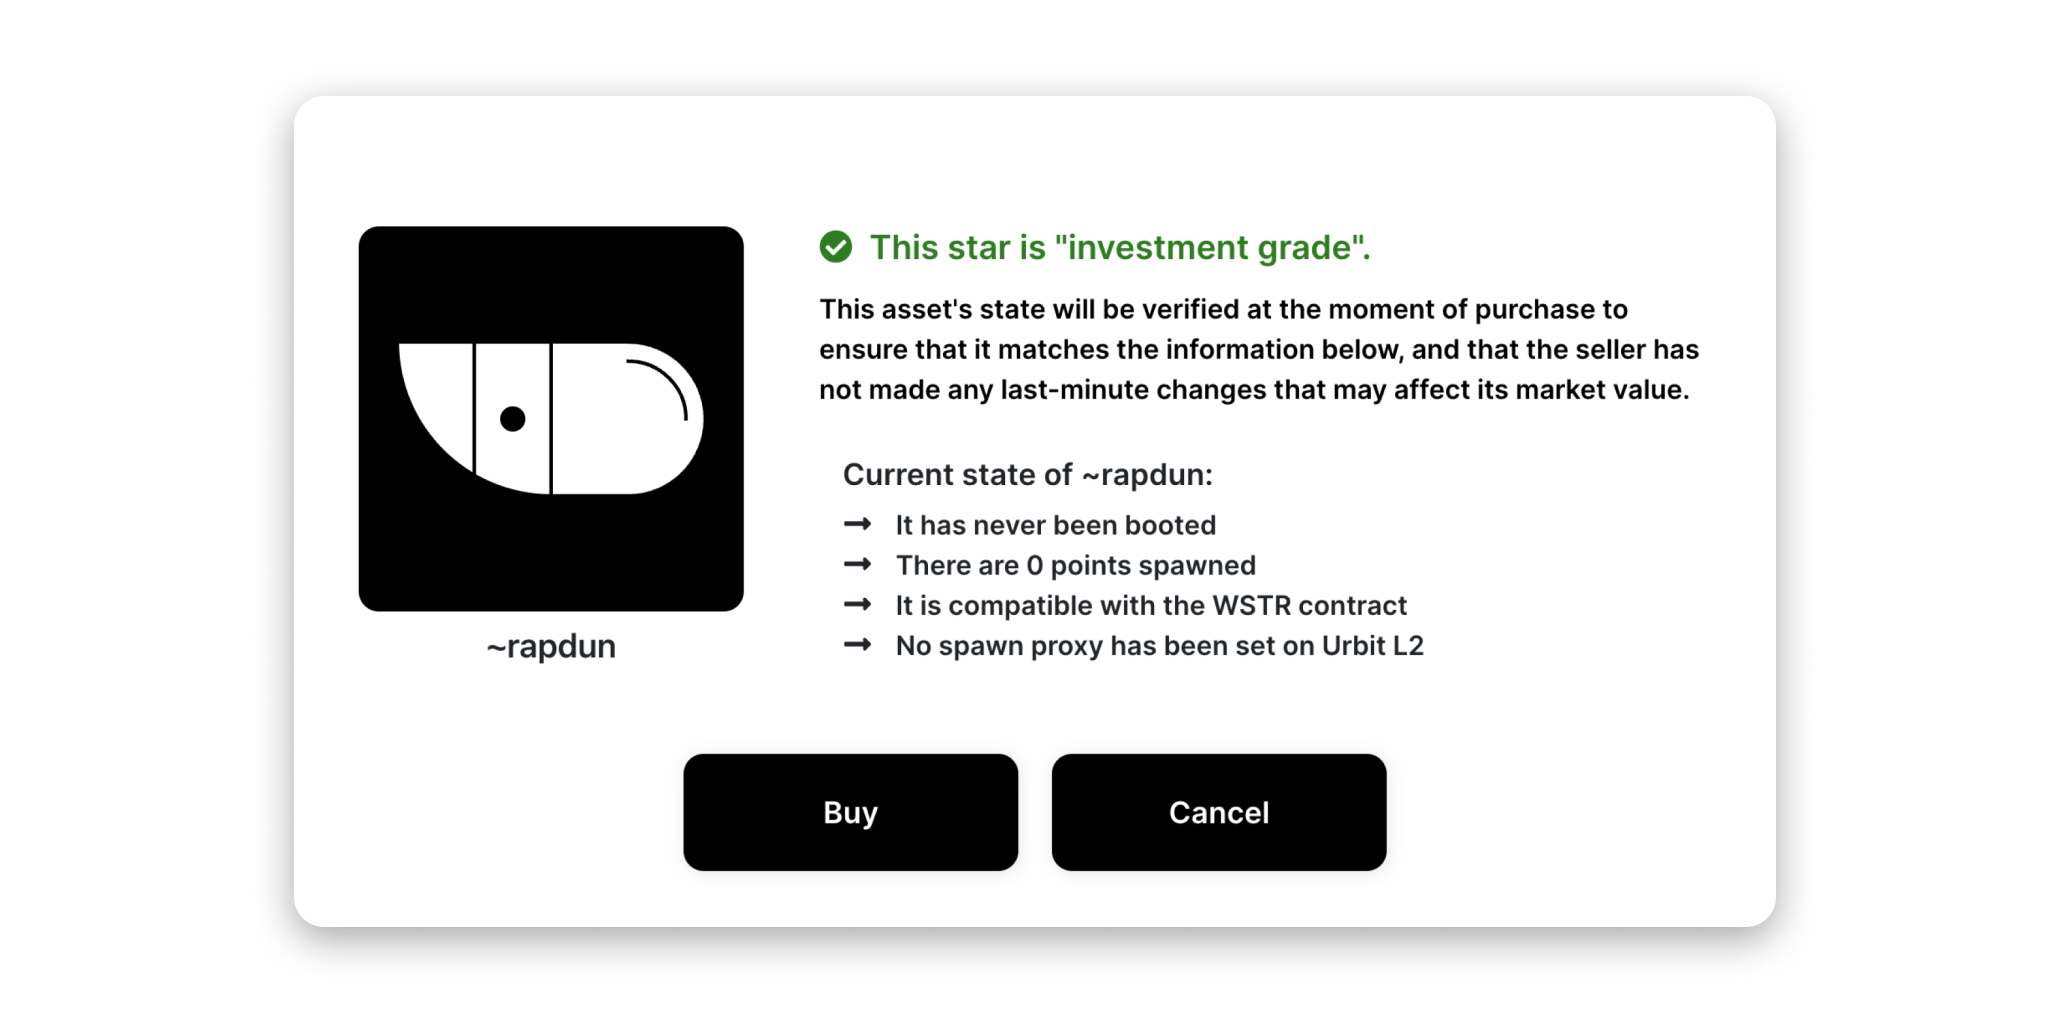
You’ll then see a this state verfication notice that this is a “virgin” star, which contains all its planets and has never been booted.
Click the “Buy” button to continue, which will open your Metamask wallet to complete the transaction. Review the information, and click “Confirm.”
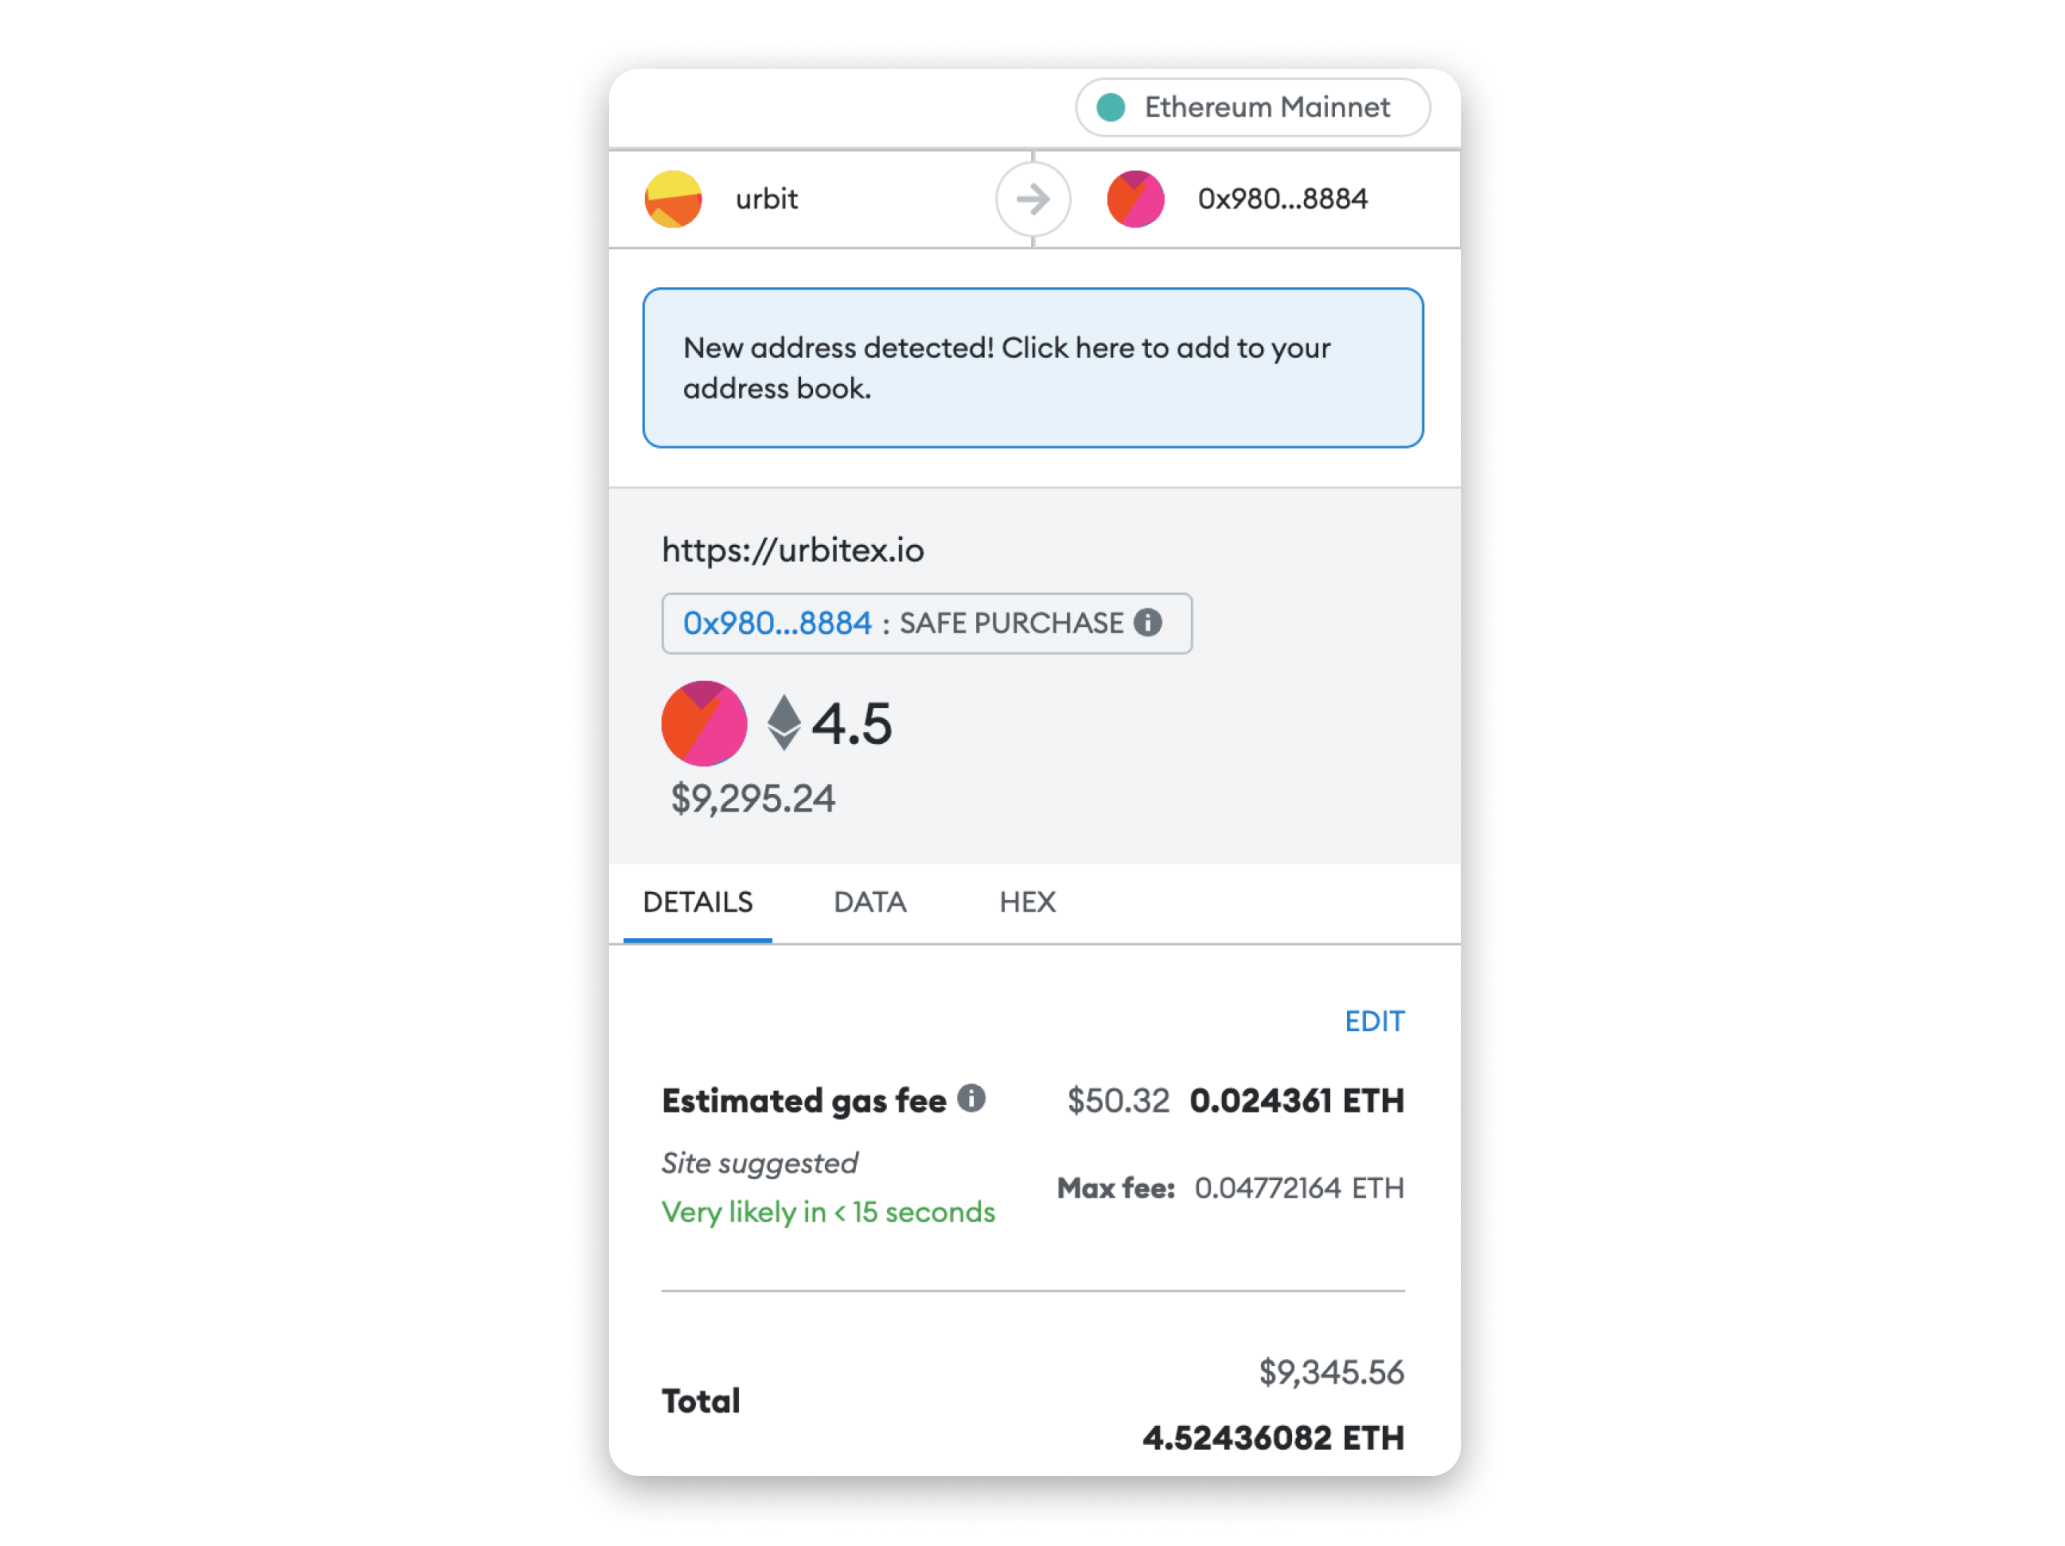
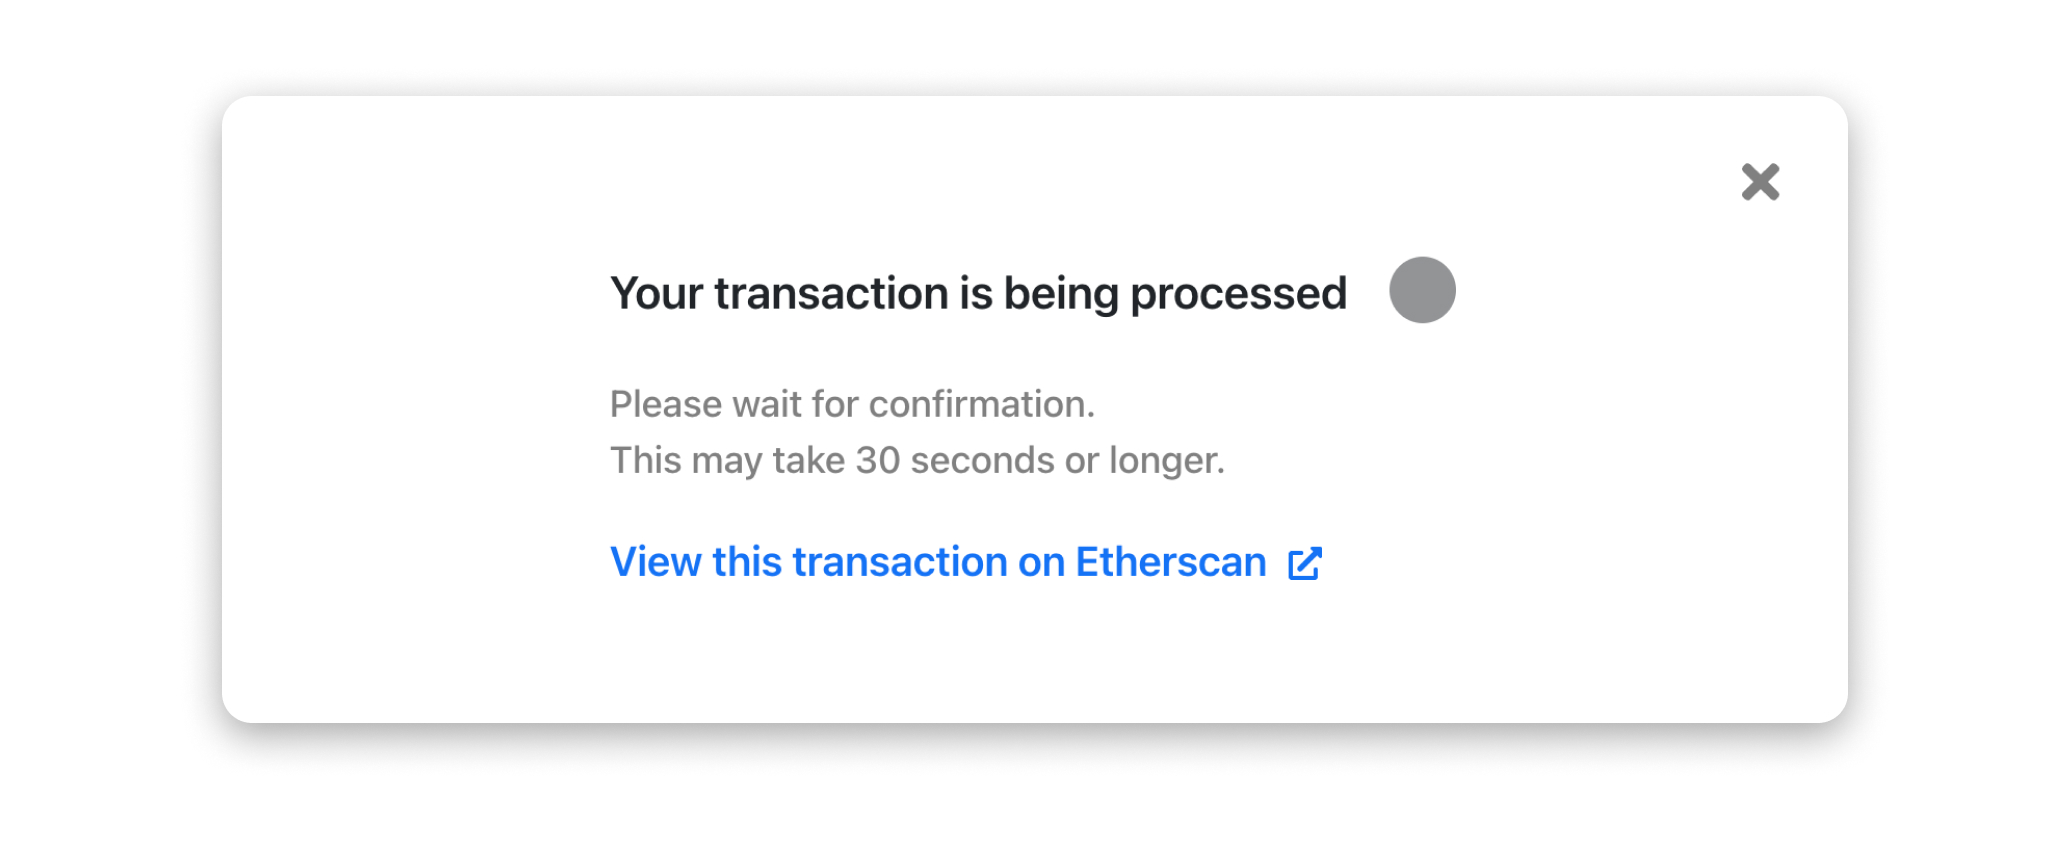
Metamask will then begin processing the Ethereum transaction, which could take a minute. It will be listed as “pending” in Metamask until completion.” Once completed, Urbitex will display a notification that reads “Transaction confirmed” and direct you to your wallet page.
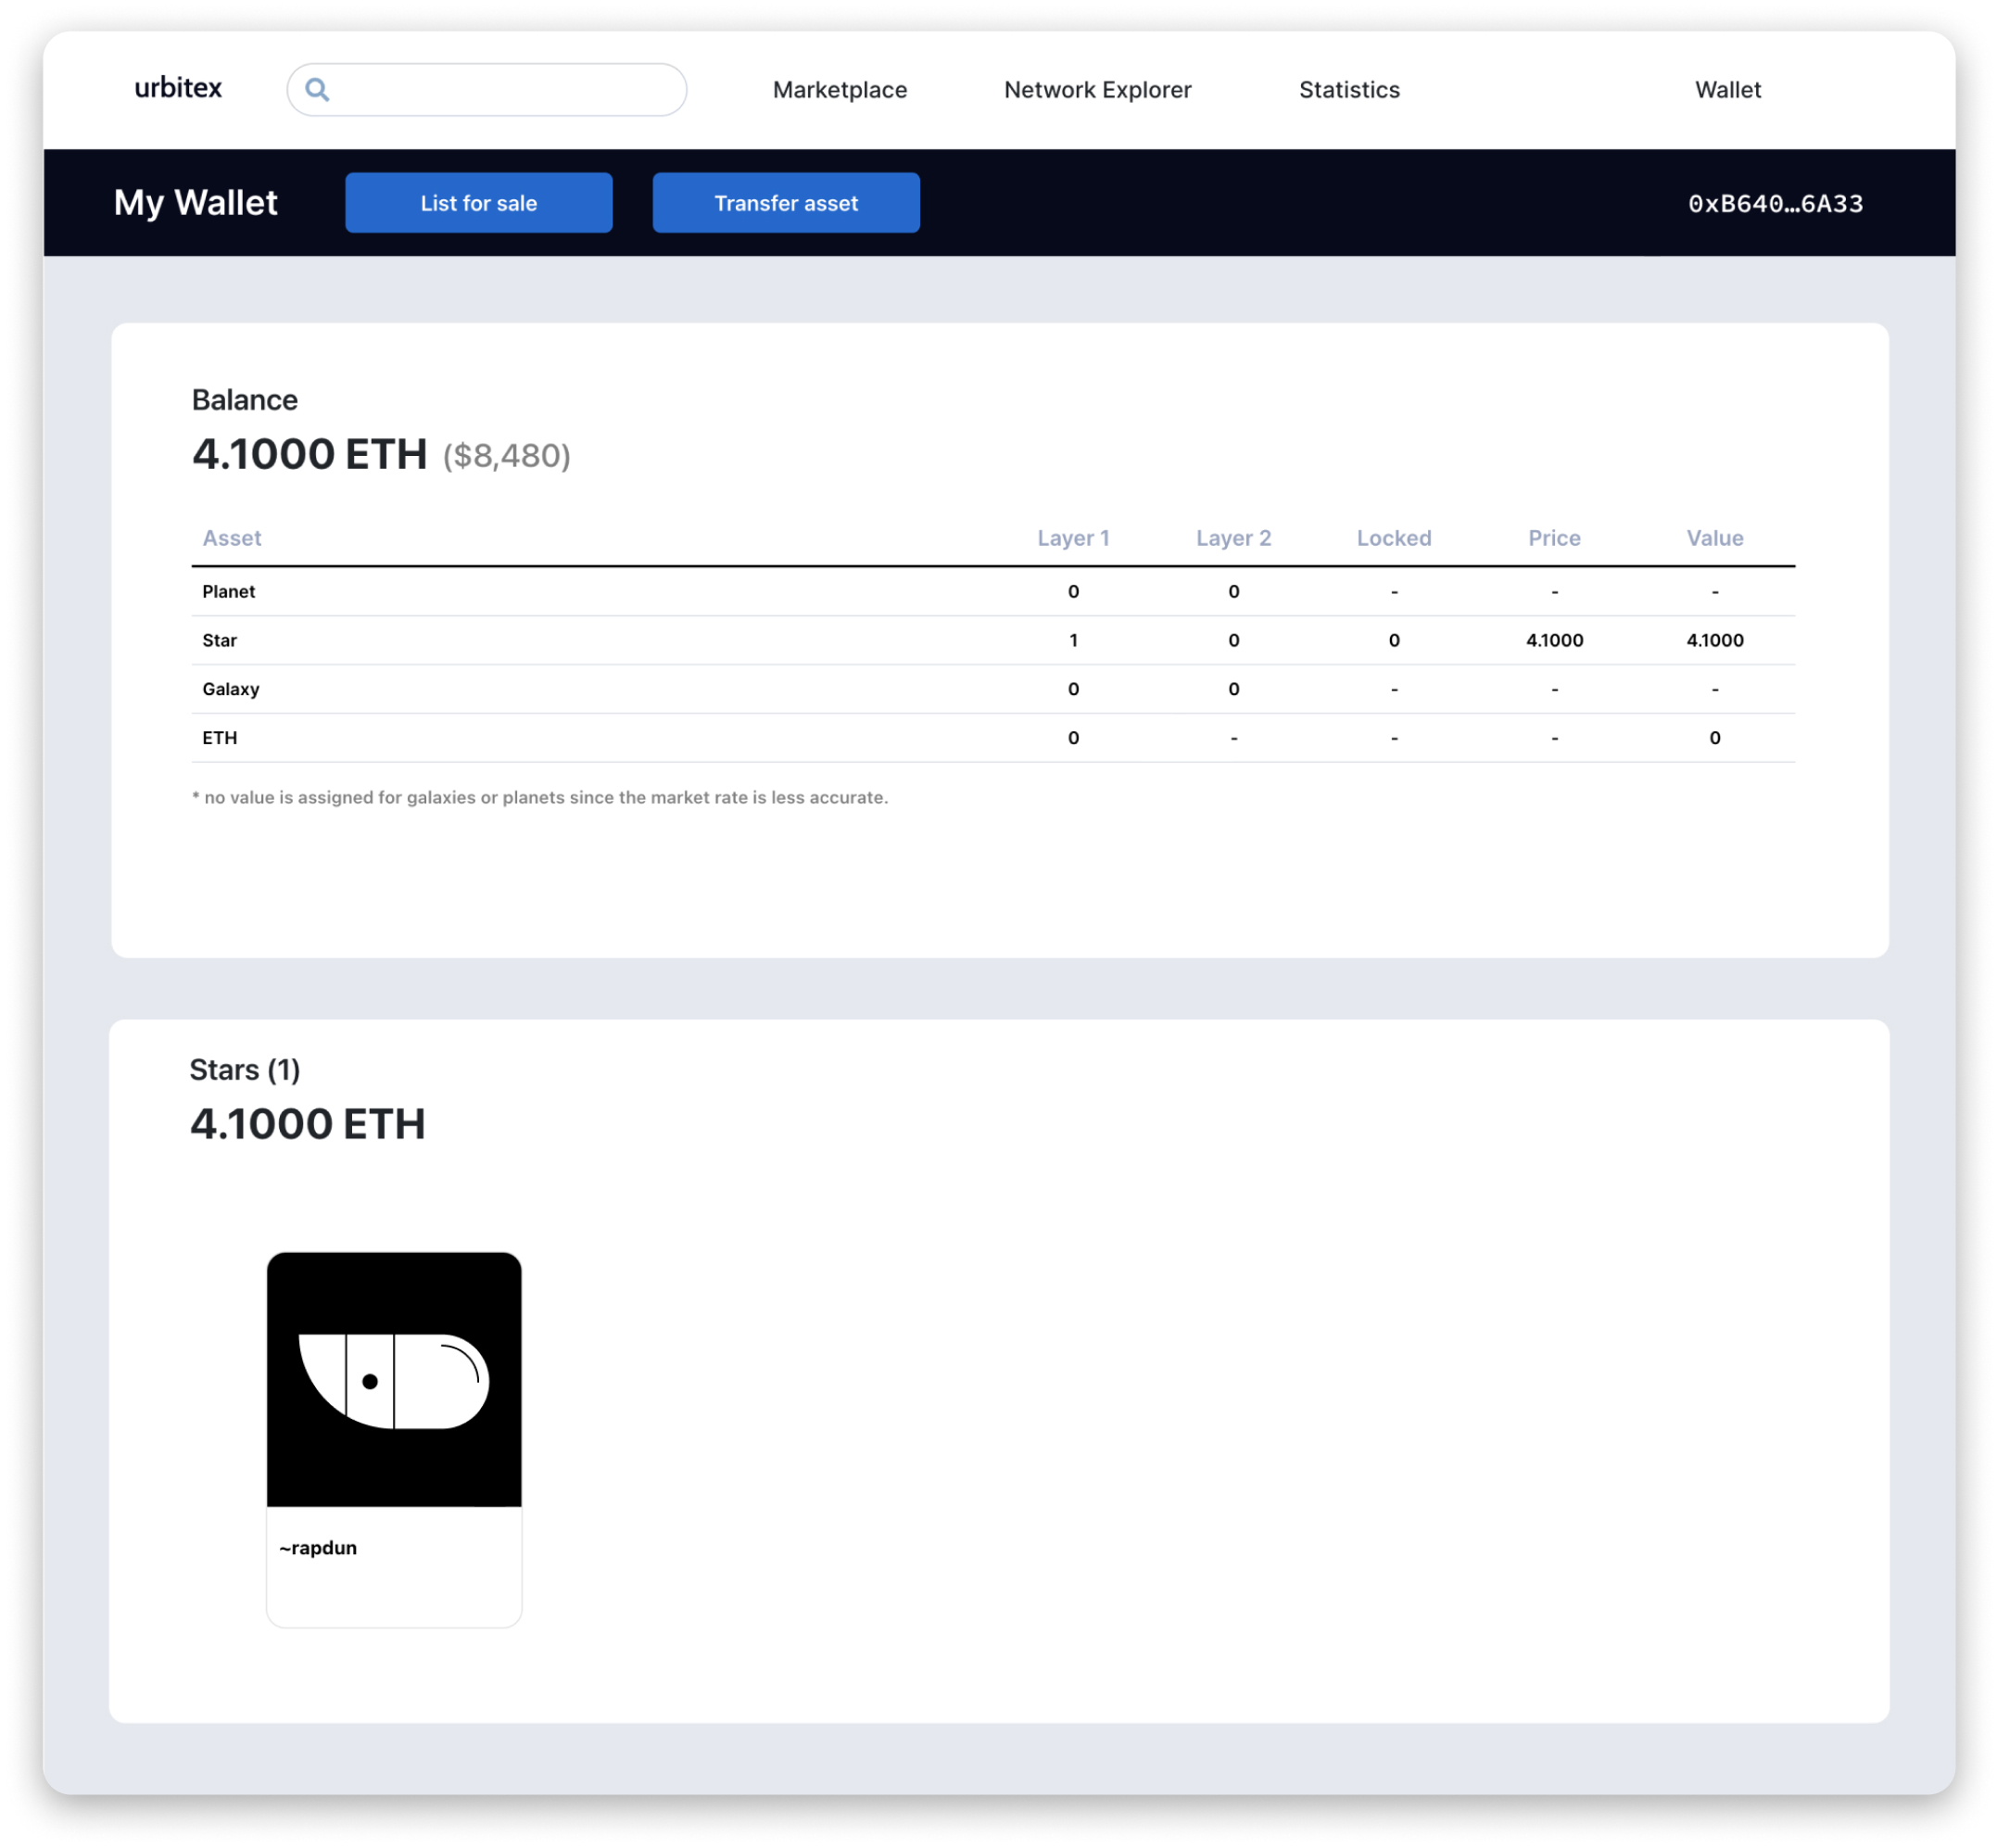
Here, you’ll see your Balance in ETH and USD, as well as the type of Urbit assets you own. We can see ~rapdun, our newly purchased star in the Stars section.
6. Next steps
You’re now a star owner. You can simply hold onto it as an investment and sell when you feel like it, or put your star to work by becoming a star operator.
- Read our guide to running a star
- Read our guide on layer 2 for stars
- Read our guide to sell a star on Urbitex
1. Connect your wallet to Urbitex
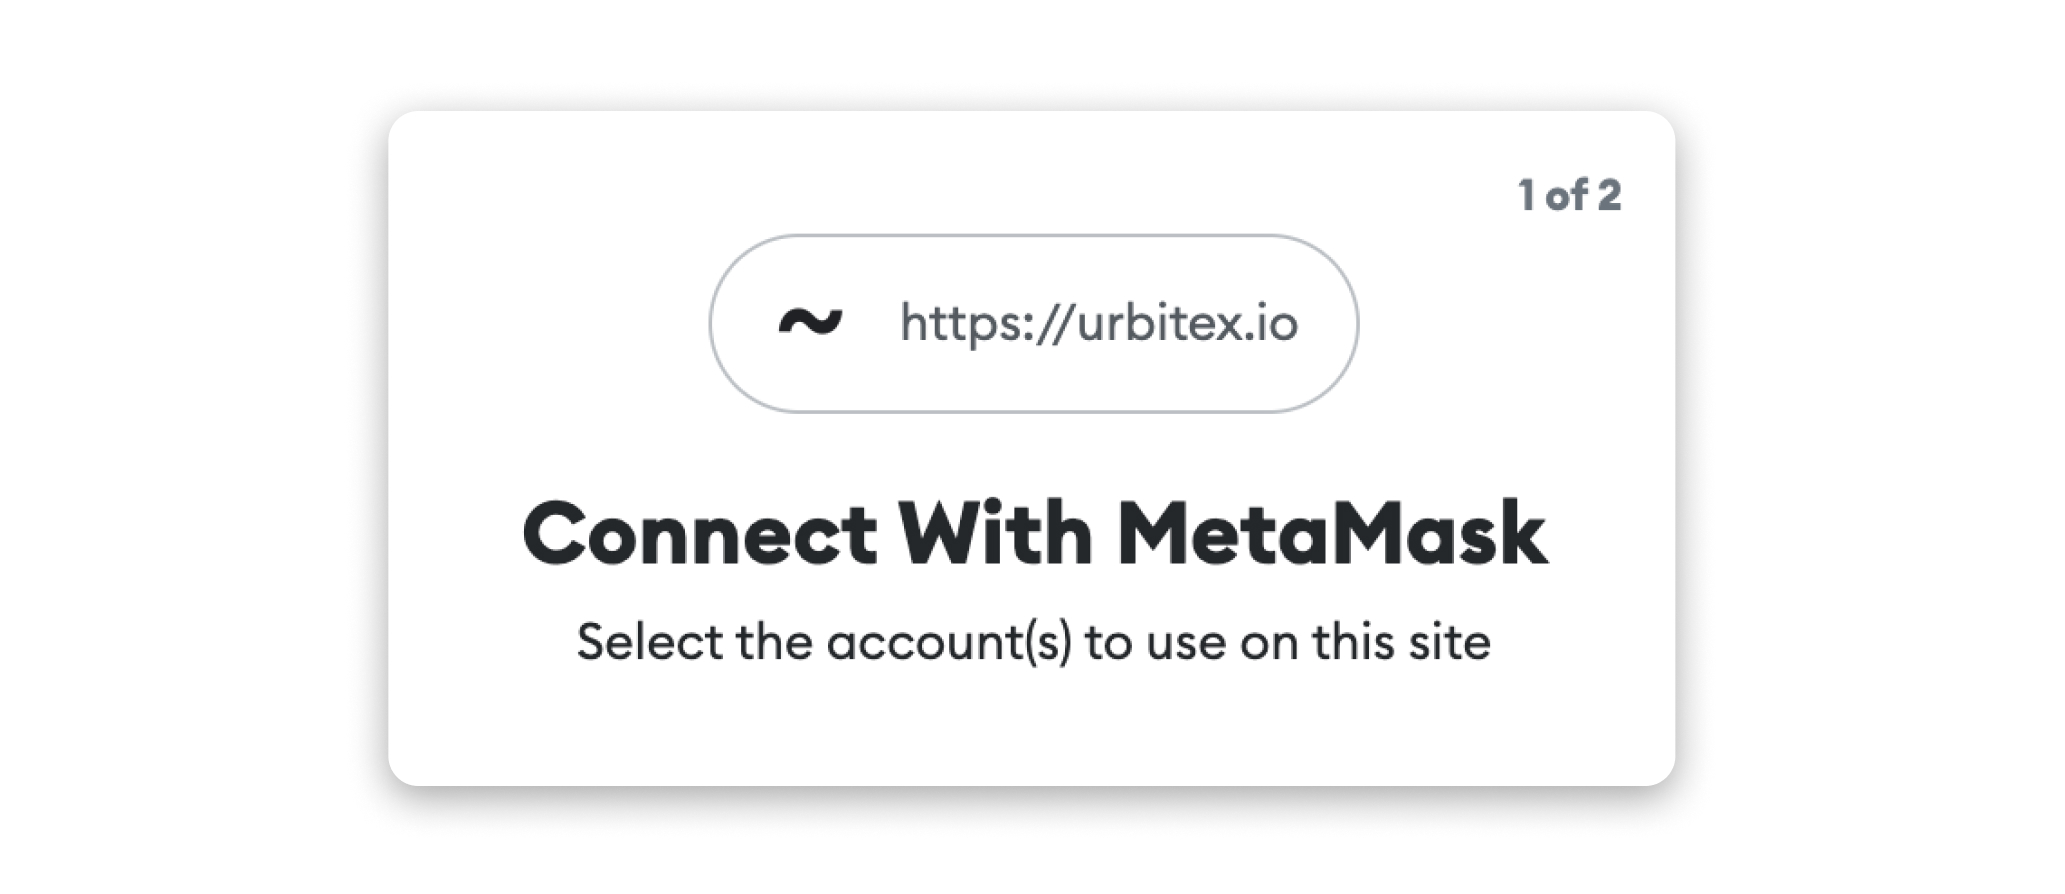
Point your browser to urbitex.io, and click wallet in the upper right corner. This will open your Metamask browser extension and prompt you to connect your wallet. Confirm which account you wish to connect, and continue.
2. Select a star to sell
Point your browser to your wallet page at urbitex.io/account and click on the “List for sale” button in the upper left.
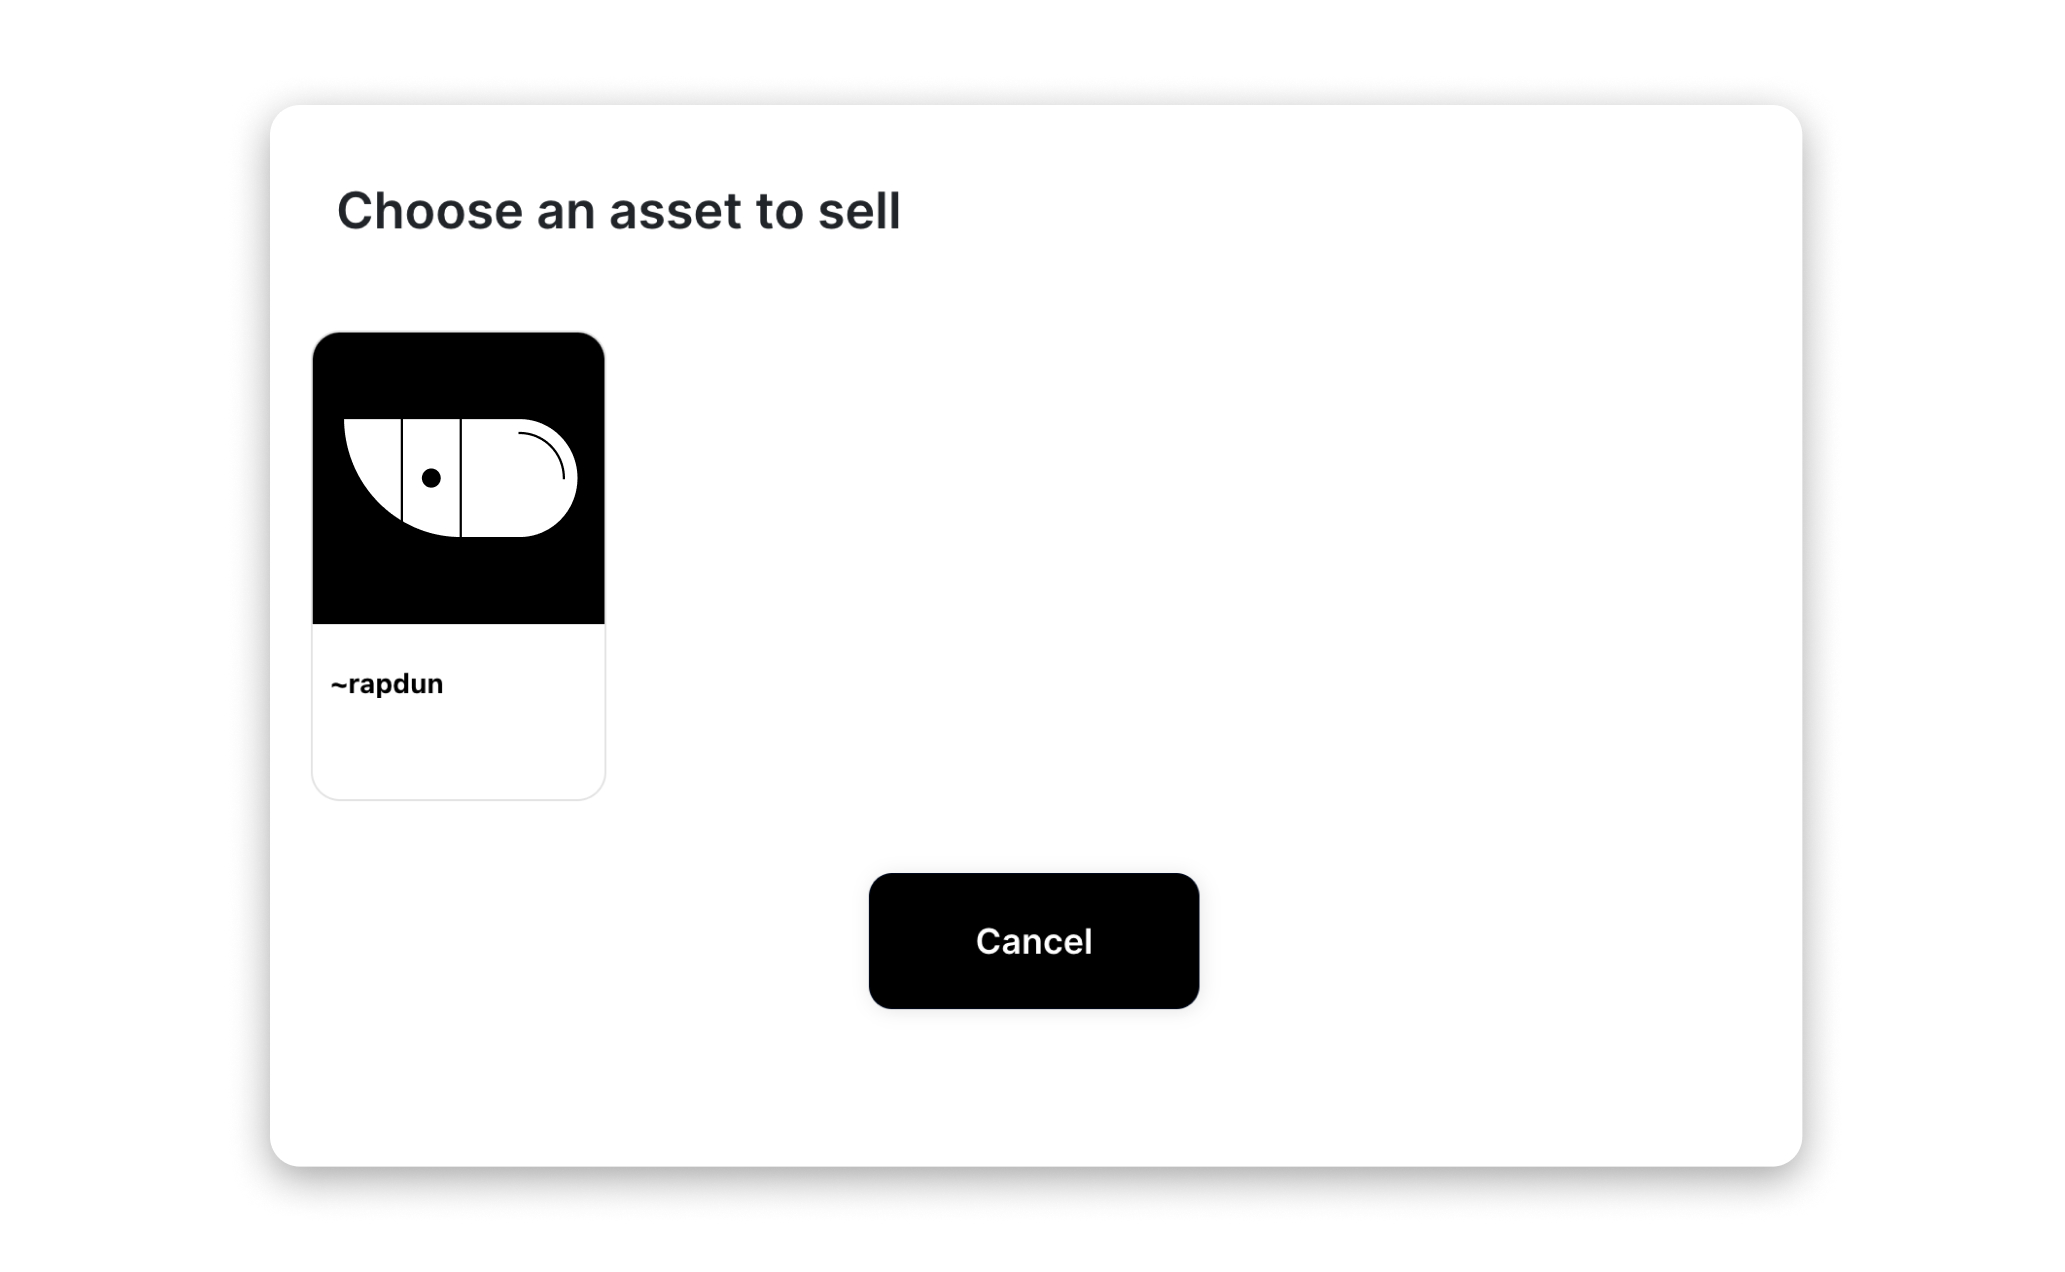
In the modal window, choose the star you wish to sell.
3. Create a listing
You’ll be brought to a “List for sale” page for the star that you selected.
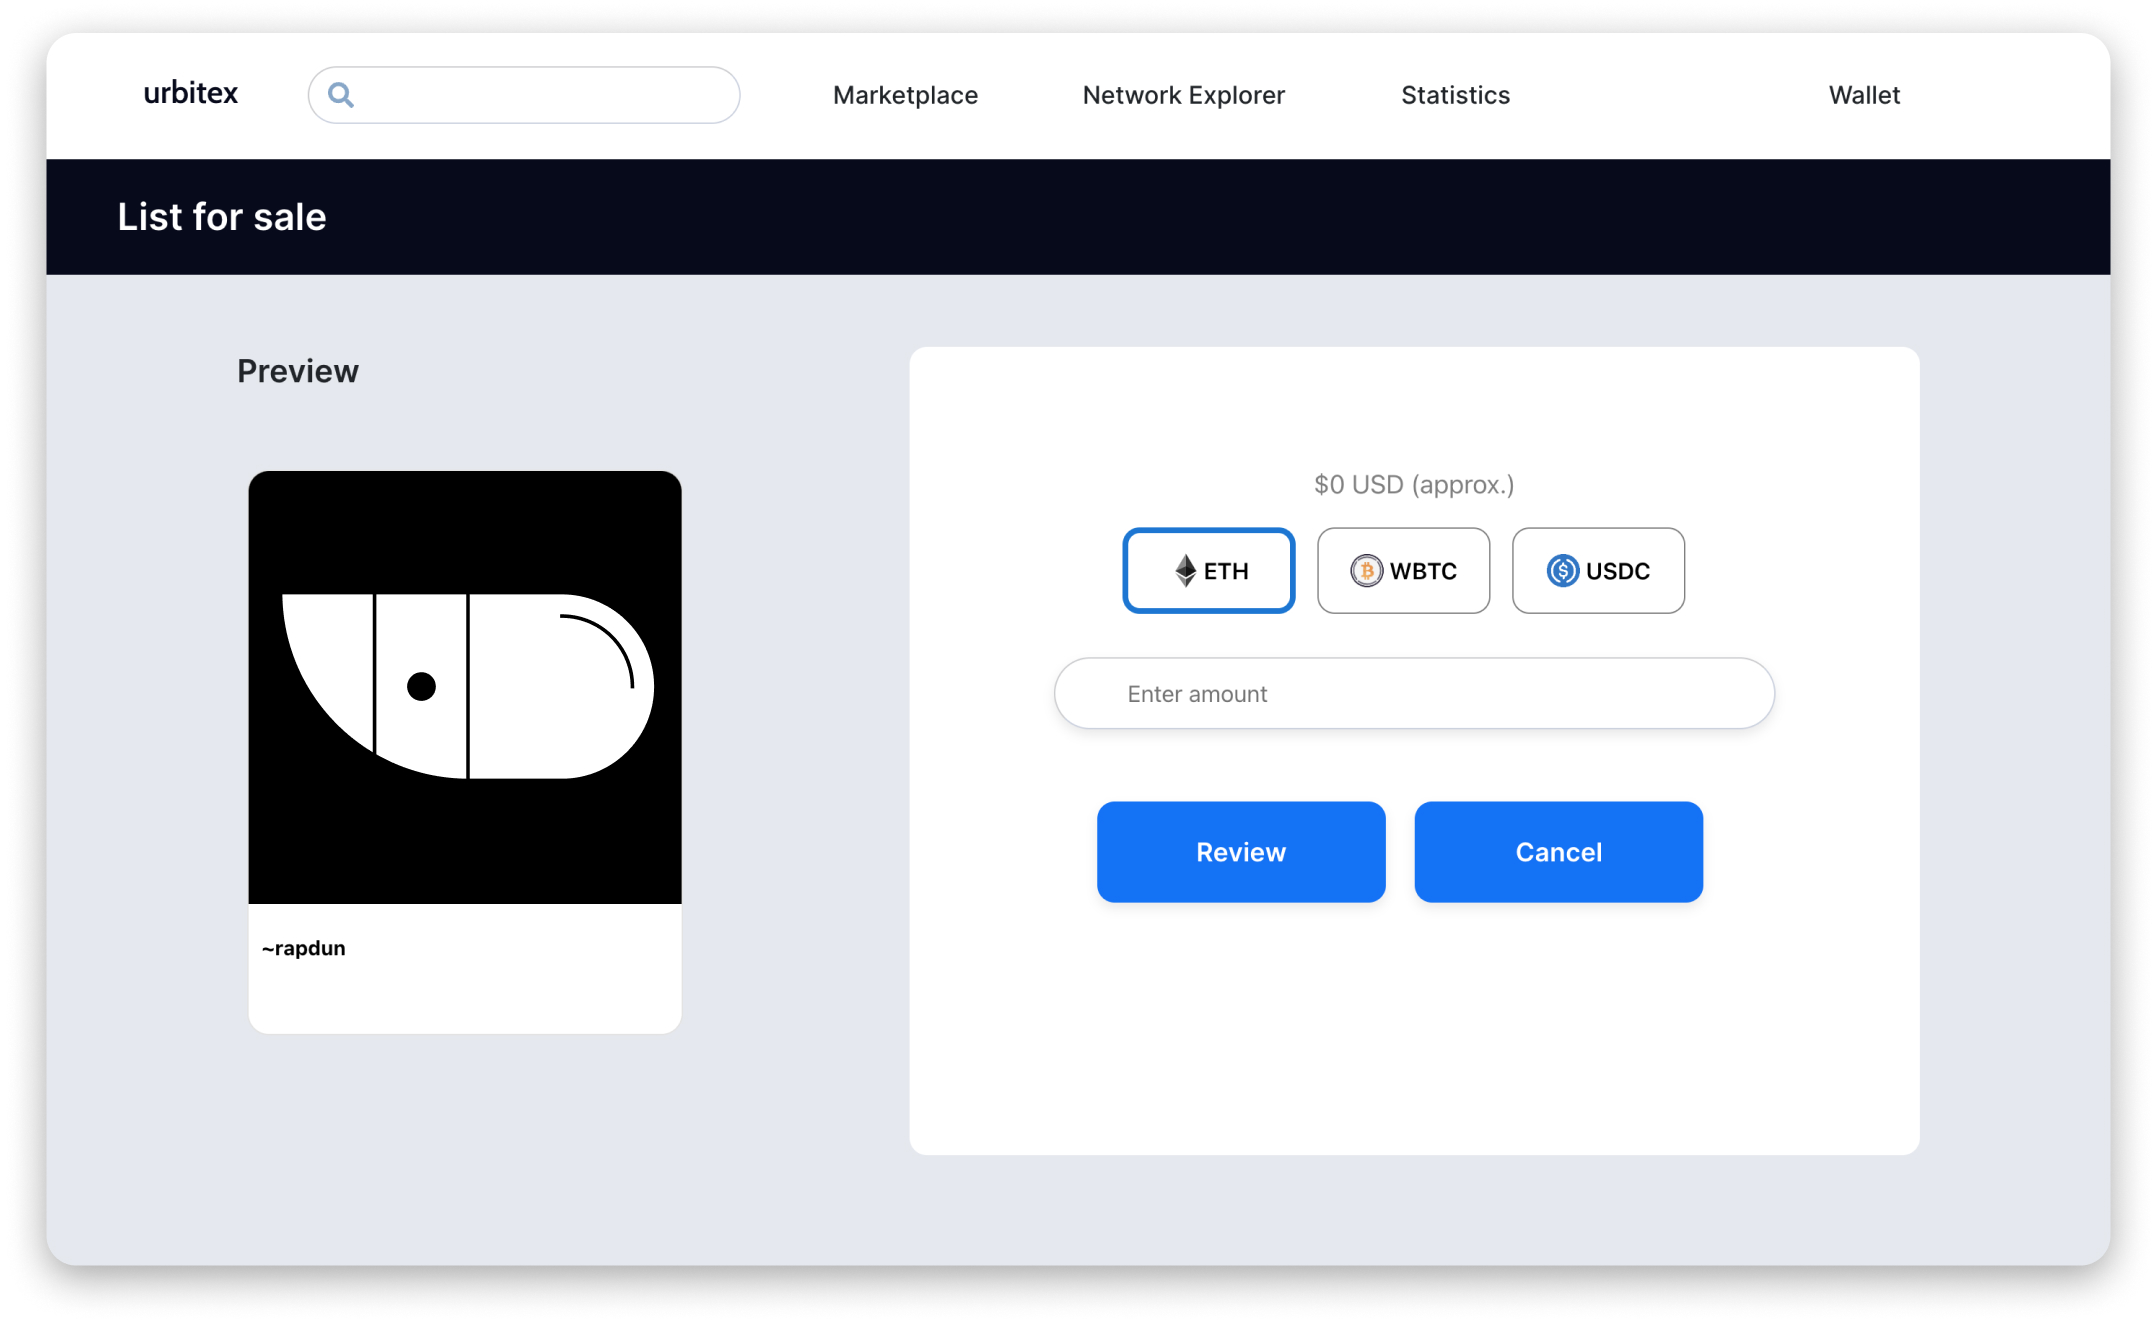
Select a currency and choose a price. Stars tend to be priced in Ethereum. Then click the “Review” button.
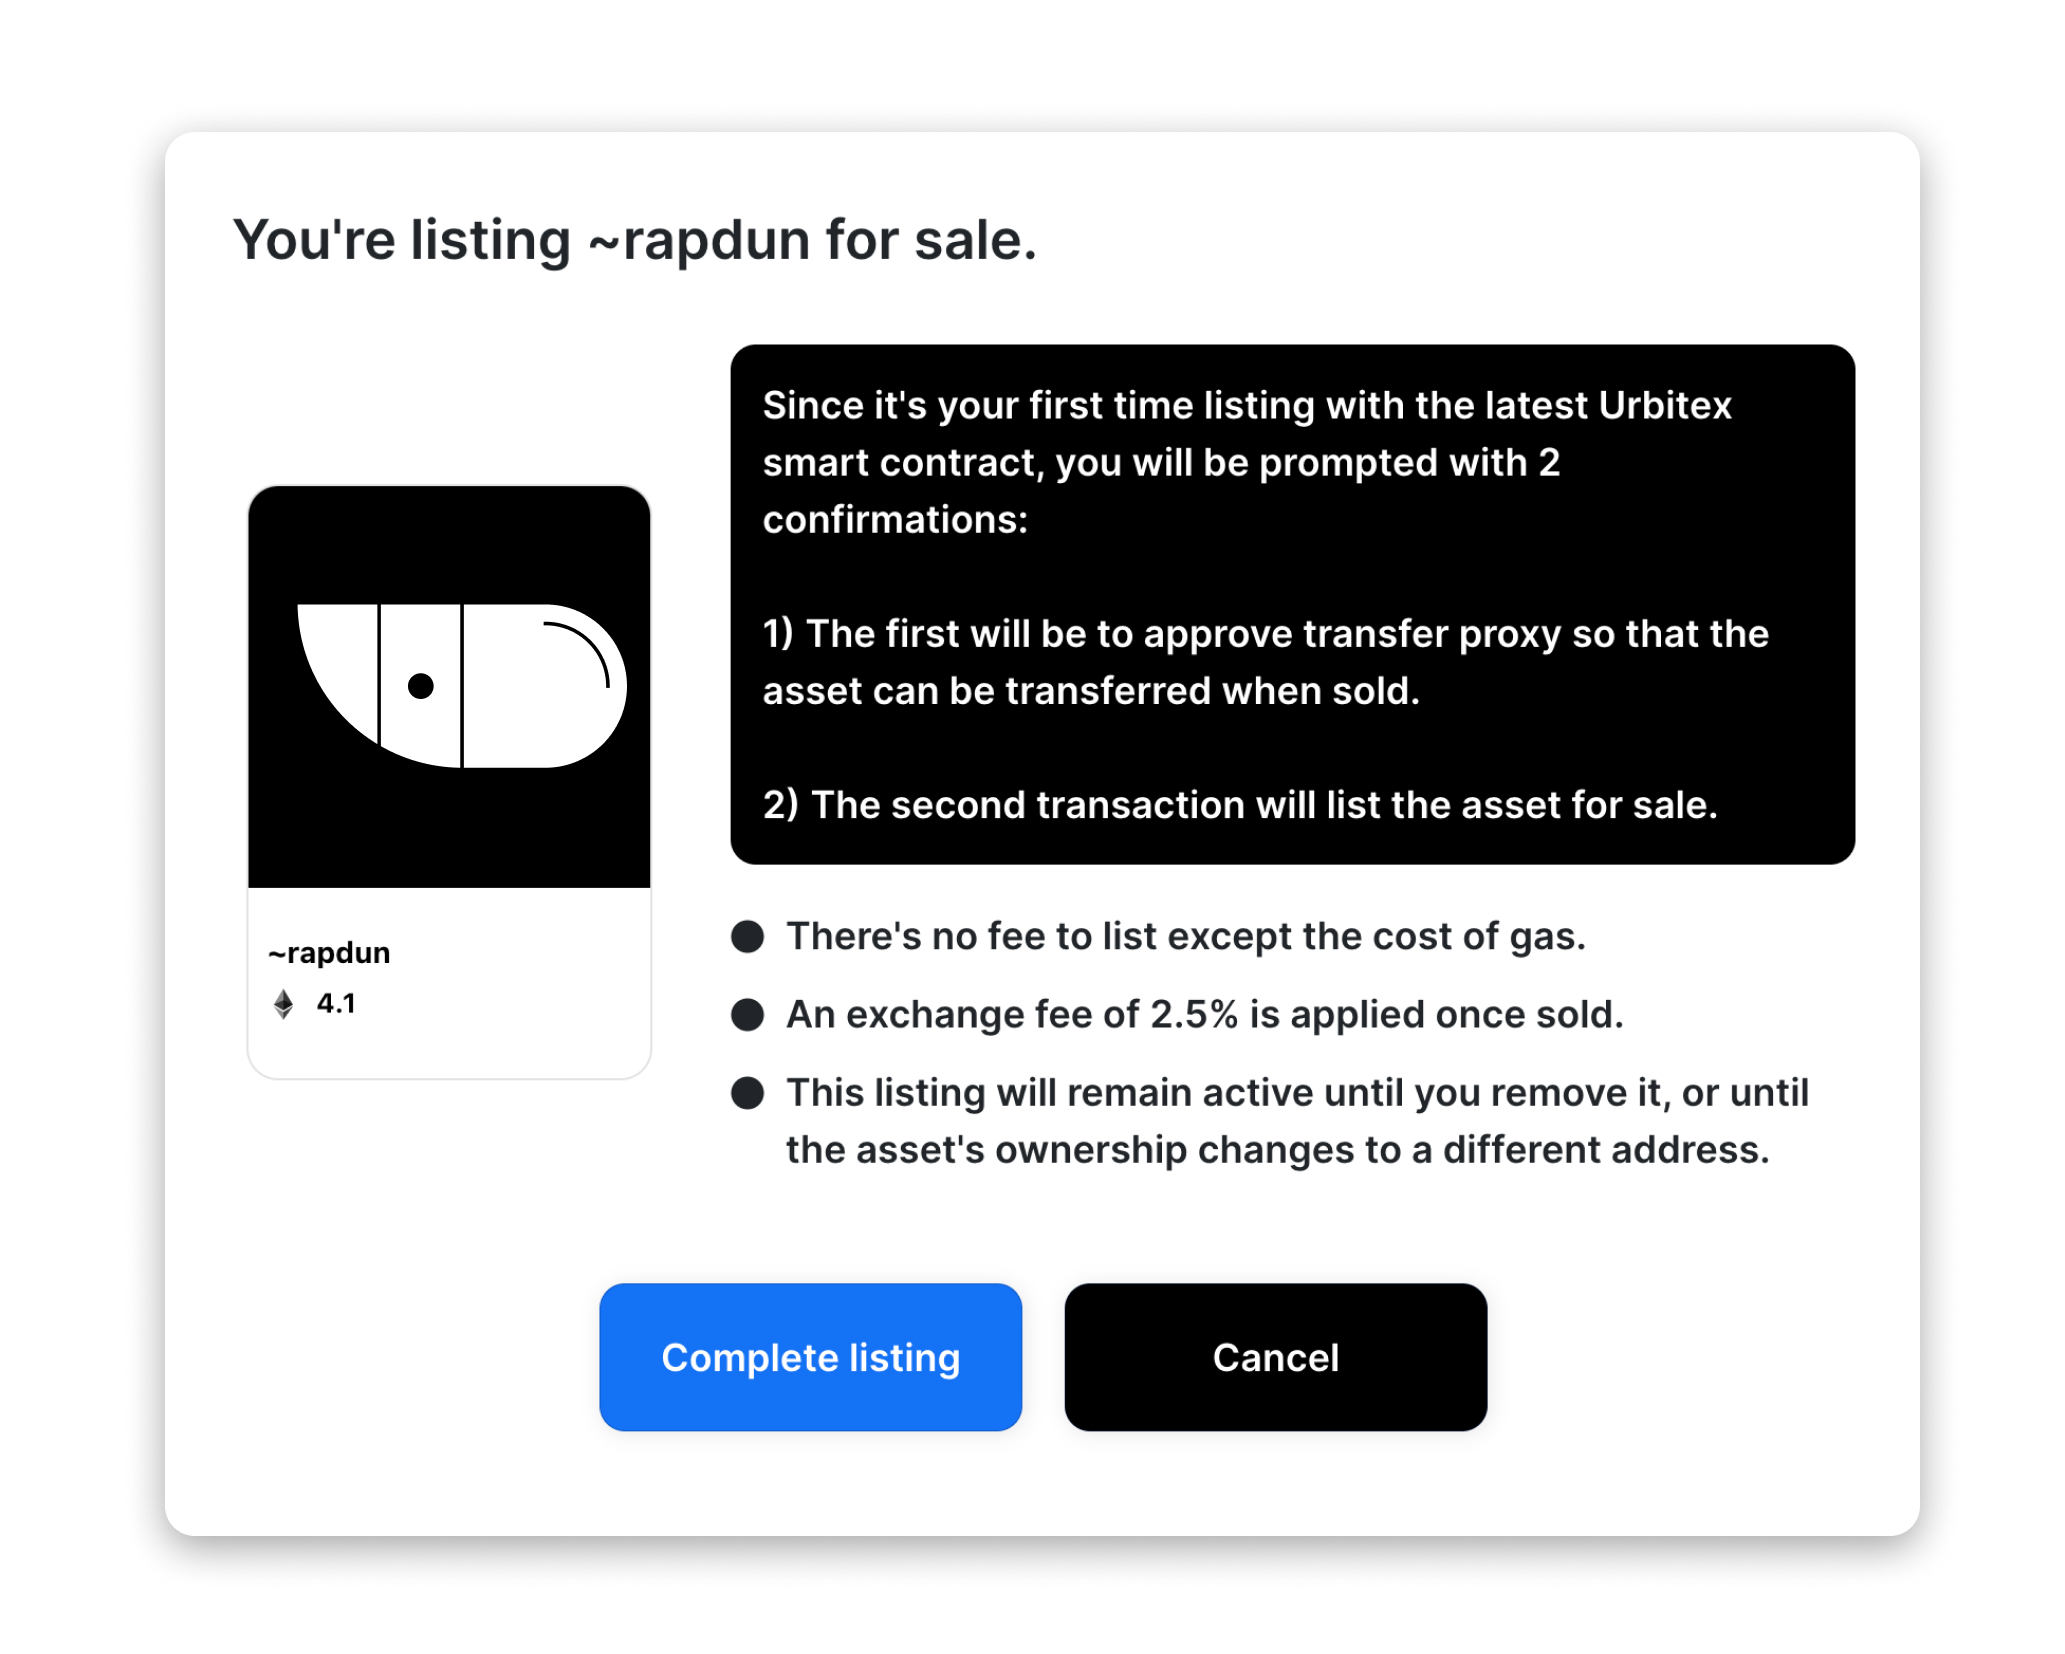
Read the fine print, and then click the “Complete Listing” button.
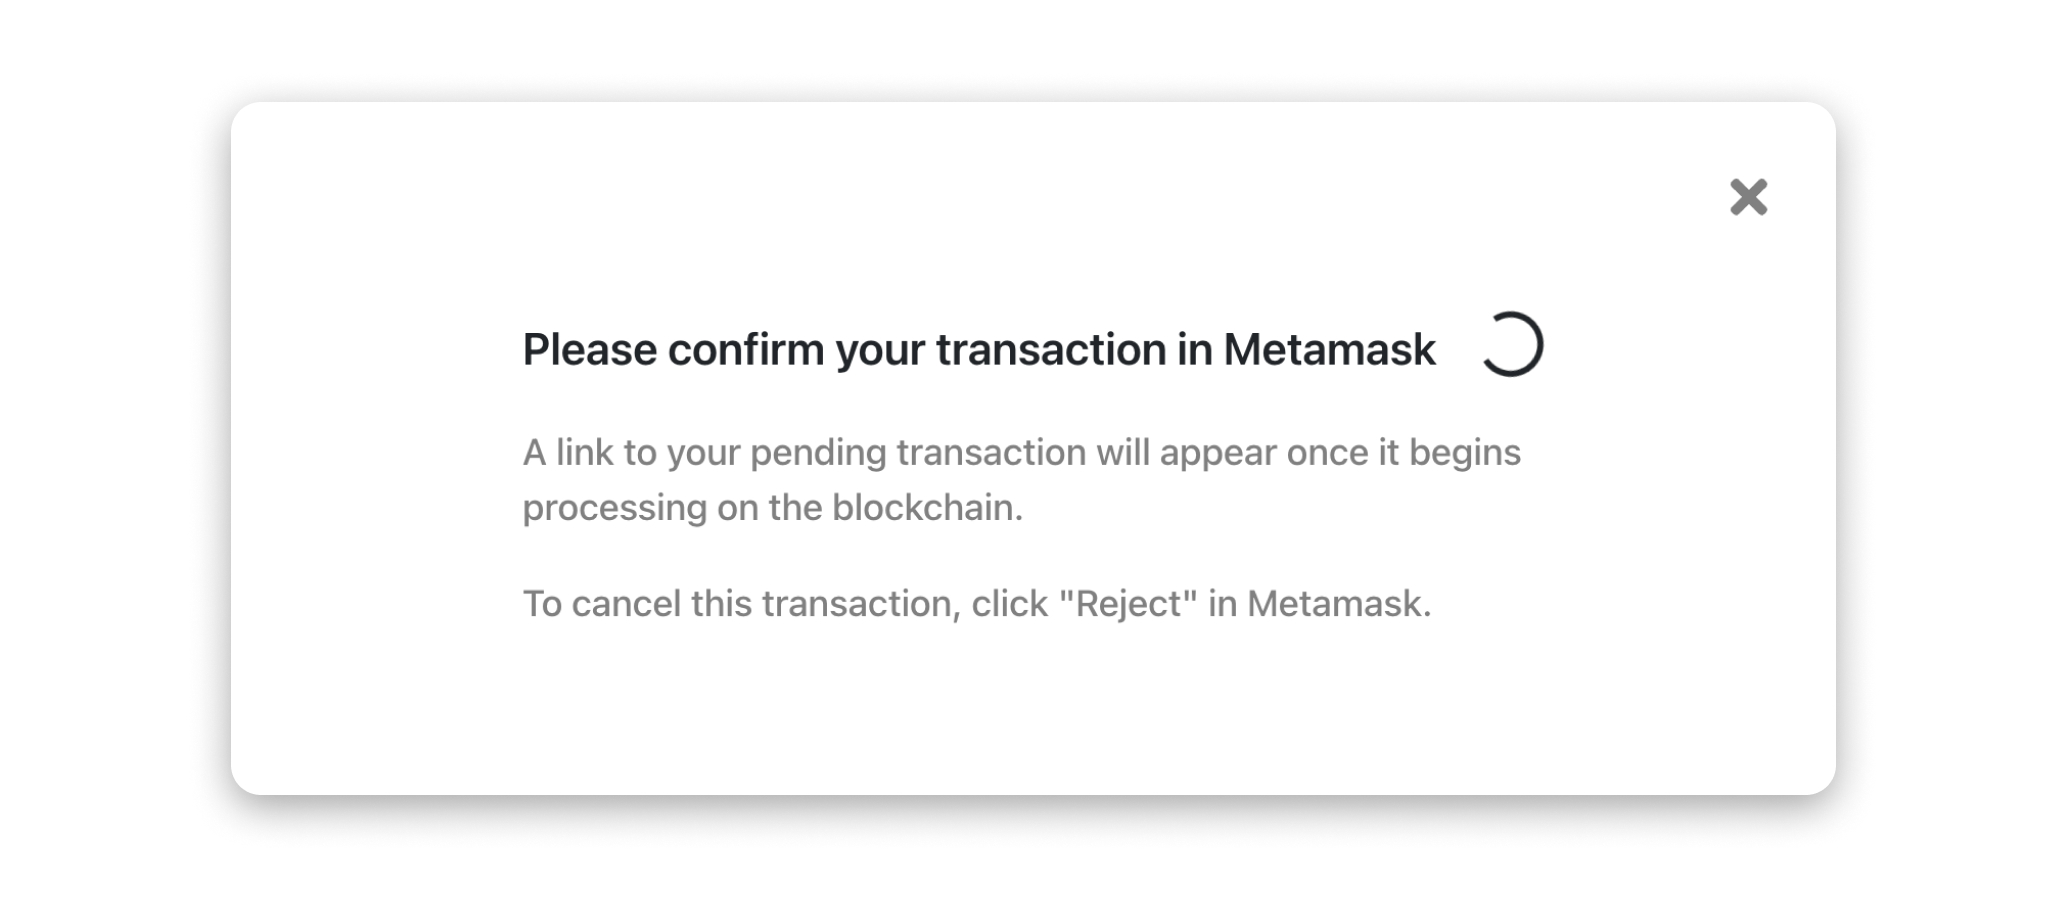
Confirm the transactions in Metamask, and wait for their confirmation.
Once the transaction is finished, you’ll see a notification that your star has been listed for sale, and will be directed to your star’s page which will show that it is for sale along with an option to remove the listing.
4. Next steps
Now, all you have to do is wait!
At this time, Urbitex doesn’t collect any personal information so you won’t receive any notification that your star has been sold. You’ll simply have to check your crypto wallet or Urbitex to see the status of your star for sale.
Urbitex is under rapid development and this feature should be available soon.