The goal of this guide is to have clear and easy to follow best practices for deploying an Urbit node to a server you control in the cloud. Deploying in the cloud allows you to access your Urbit from any device.
Most Urbit users start out running their ship locally on one machine in order to play with it, but this means when your machine is offline your Urbit node is offline too (and can't get updates). You can also only access your Urbit from that one machine.
This guide uses Digital Ocean as the cloud provider, but others can be used. If using another provider, the setup script provided and other server configuration instructions may need to be modified or done manually.
1. Create a Droplet
Create an account on Digital Ocean. Once you make an account, choose "Deploy a virtual machine".
You should see the page below where you can create your Droplet, aka Virtual Machine:
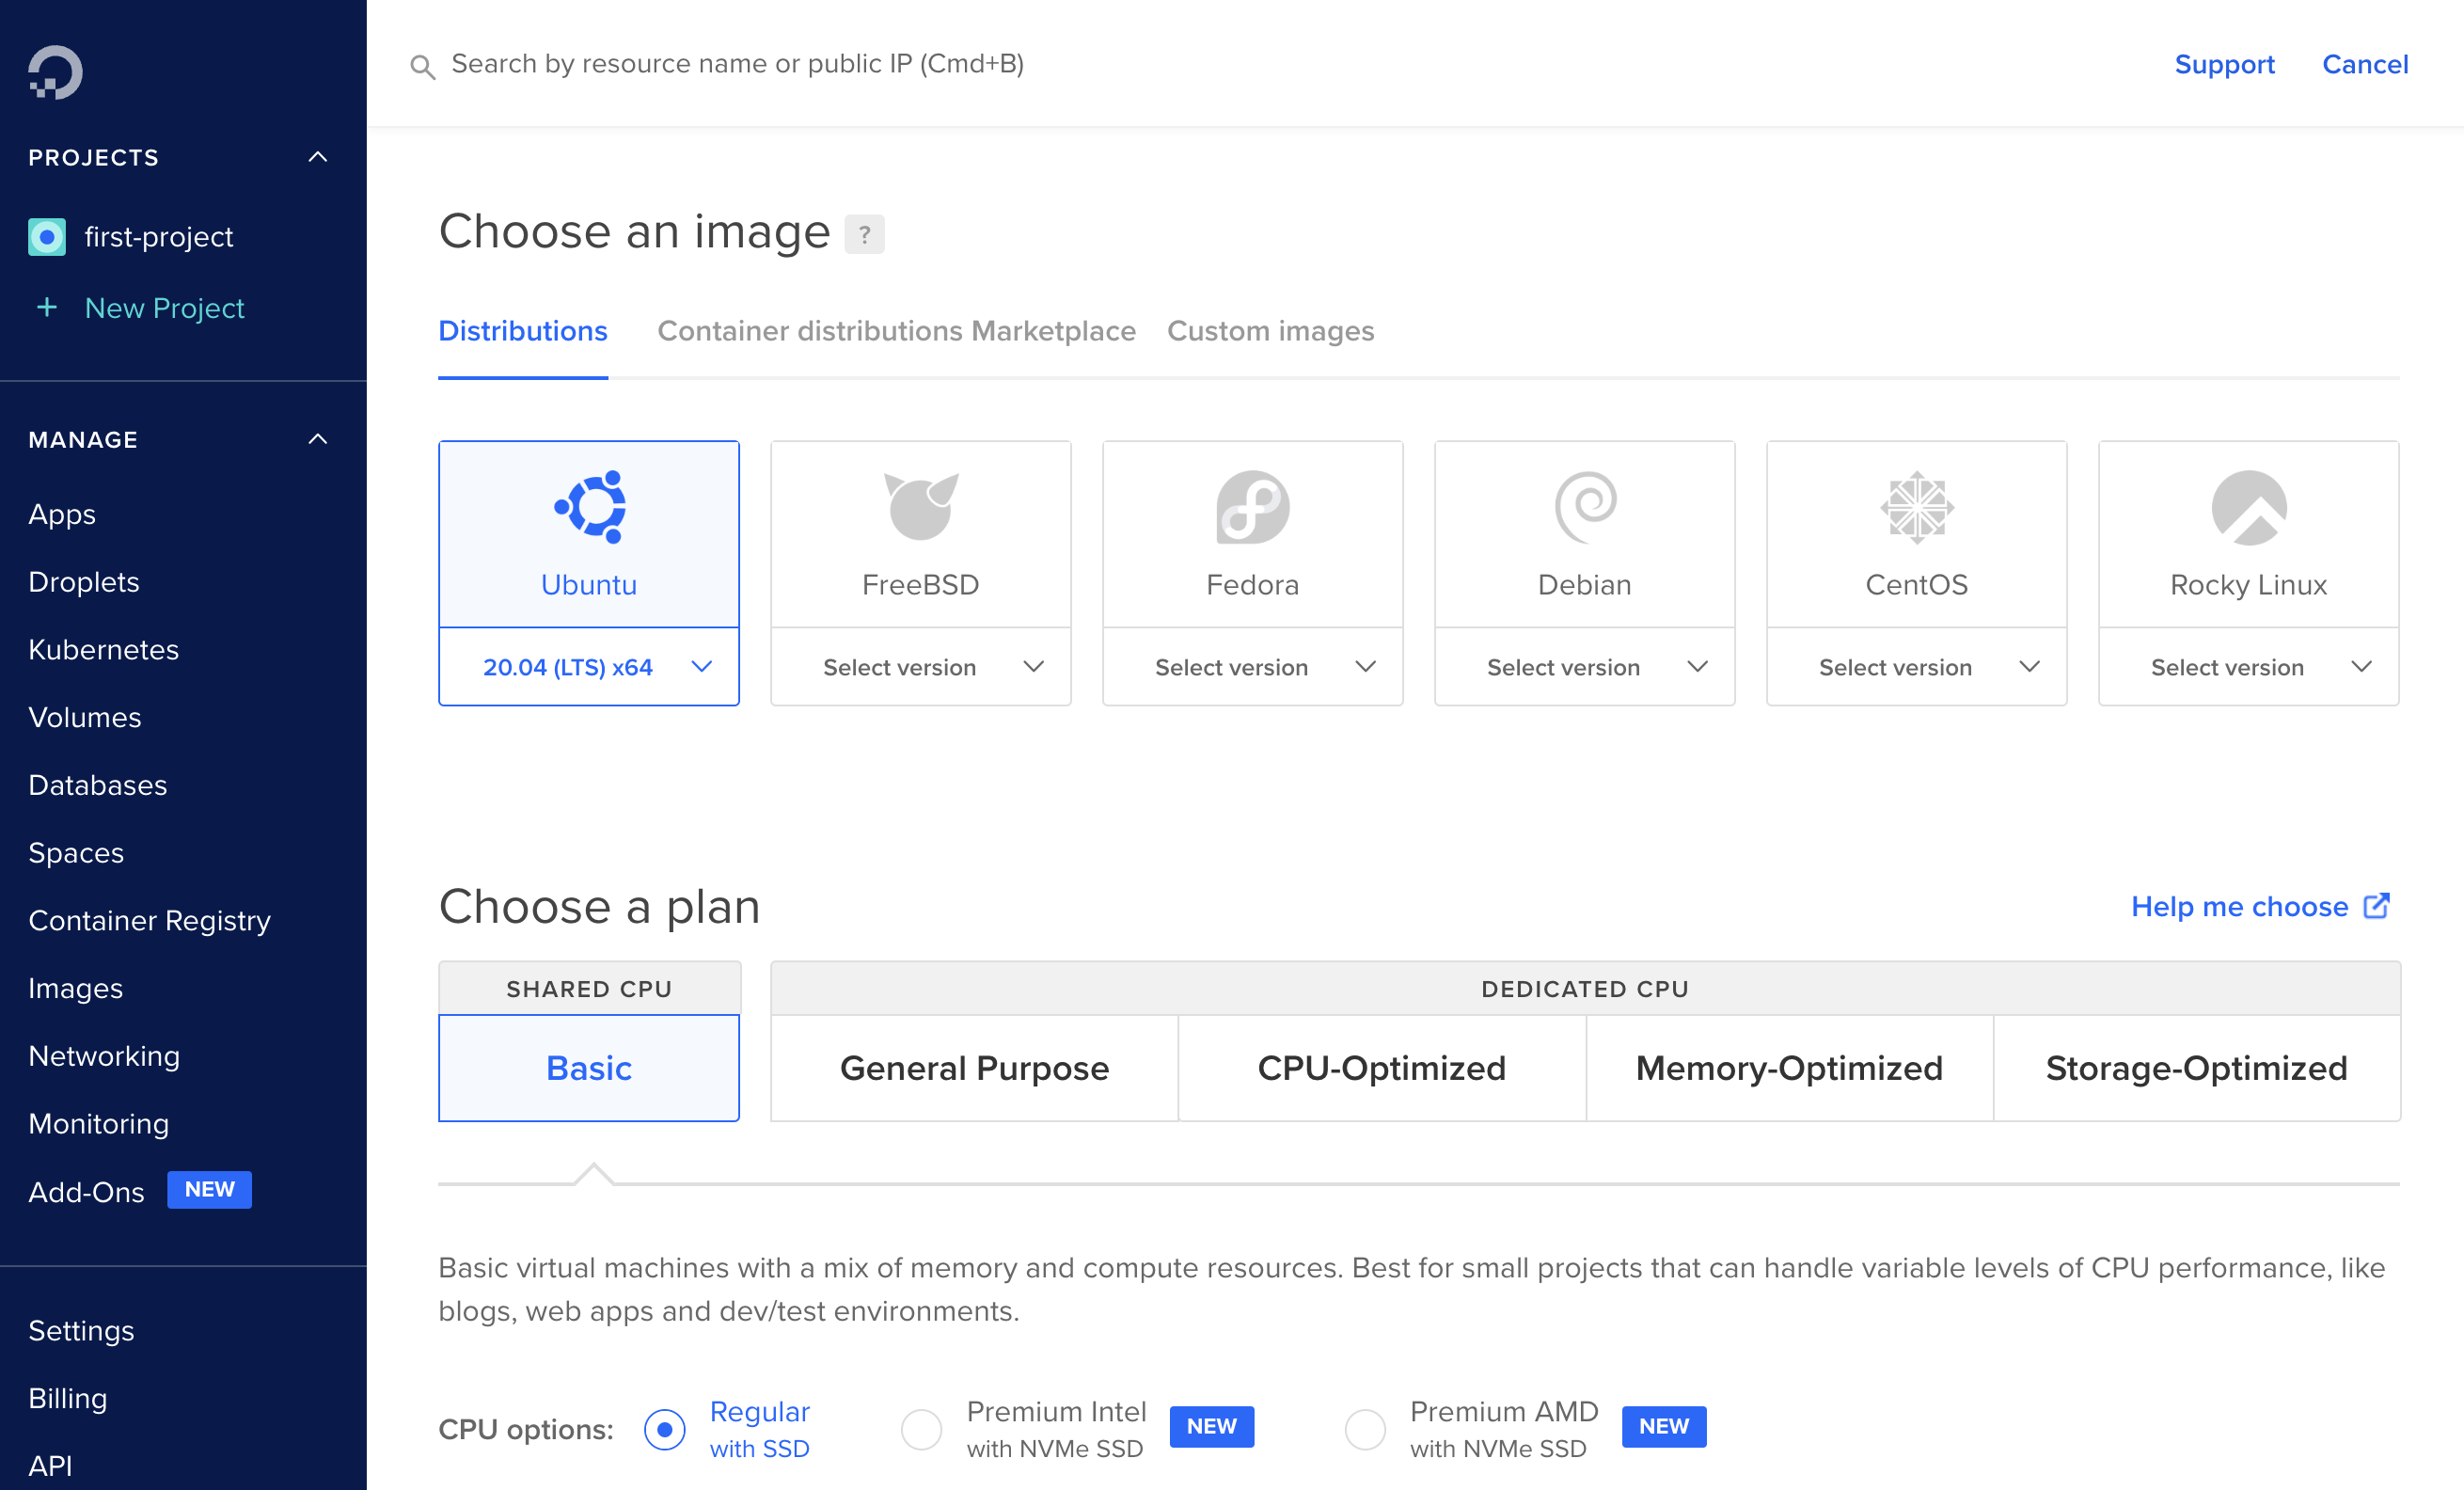
Fill out the options like so:
Image
Ubuntu 22.04 x64
Plan
- Shared CPU: Basic
- CPU options: Regular with SSD
- 2GB / 1 CPU ($12/mo)
You can choose a more powerful option if you'd like but the $12 option should be sufficient. Note Urbit needs 2GB of memory; it's possible to choose a cheaper option and run it with less memory by using swap but it will impact performance.
Add block storage
The $12 plan includes 50GB which should be sufficient for quite some time, so you can skip this.
Datacenter region
Choose the region closest to you.
VPC Network
Leave this as default.
Authentication
In the "Authentication" field, select "SSH keys" and hit "New SSH Key". Run the following command in the terminal on your local machine, replacing riclen-tinlyr with the name of your ship (sans the leading ~):
SHIP="riclen-tinlyr" bash -c 'ssh-keygen -q -N "" -C $SHIP -f ~/.ssh/$SHIP && cat ~/.ssh/$SHIP.pub'
It should spit out a long string of letters and numbers beginning with ssh-rsa and ending with your ship name. Copy the whole thing and paste it into the "SSH key content" field on Digital Ocean. In the "Name" field, enter your ship name.
Additional options
Click "User data" and paste the script below into the field provided. This will automatically configure the server and install necessary software.
#!/bin/bash# configure swapfallocate -l 2G /swapfilechmod 600 /swapfilemkswap /swapfileswapon /swapfileecho "/swapfile swap swap defaults 0 0" >> /etc/fstab# setup firewallufw allow OpenSSHufw allow wwwufw allow httpsufw allow 34543/udpufw enable# create and configure useruseradd -s /bin/bash -d /home/urbit -m -G sudo urbitpasswd -d urbitecho "urbit ALL=(ALL) NOPASSWD:ALL" >> /etc/sudoers# configure ssh keys for usermkdir -p /home/urbit/.sshchmod 700 /home/urbit/.sshcp /root/.ssh/authorized_keys /home/urbit/.ssh/authorized_keyschmod 600 /home/urbit/.ssh/authorized_keyschown -R urbit:urbit /home/urbit/.ssh# configure sshdmkdir -p /etc/ssh/sshd_config.dcat > /etc/ssh/sshd_config.d/override.conf <<EOFPermitRootLogin noPubkeyAuthentication yesPasswordAuthentication noEOF# fetch and extract urbit binarycurl -L https://urbit.org/install/linux-x86_64/latest | tar xzk --transform='s/.*/urbit/g' -C /home/urbit/chown urbit:urbit /home/urbit/urbit# install tmuxapt -y updateapt install -y tmux# rebootsystemctl reboot
How many Droplets?
1
Choose a hostname
This will be the name the server calls itself locally, you can put in whatever you want. Your planet name is a good choice.
Add tags
Leave empty.
Select project
Leave as the default.
Create Droplet
Hit this button to create the droplet.
2. Prepare for upload
Note
This step is necessary if you already have a ship running locally and want to move it to the cloud. If you don't, you can skip this step.
In the Dojo, use either "CTRL + D" or |exit to shut down your ship.
Archive your pier by running tar cvzf riclen-tinlyr.tar.gz ~/path/to/your/pier (substitute your own ship name and pier location).
3. Connect to the server
To make connecting simple, you can add an alias to ~/.ssh/config on your local machine. Open ~/.ssh/config in an editor (you may need to create it if the file doesn't exist), and add the following to the bottom of the file (replacing the ship name with your own and the IP address with that of your droplet):
Host riclen-tinlyrHostName 161.35.148.247User urbitIdentityFile ~/.ssh/riclen-tinlyrIdentitiesOnly yes
- If you have an existing pier
- If you have a key file
Copy the archived pier to the server with the following (substituting your ship name and Host):
scp riclen-tinlyr.tar.gz riclen-tinlyr:
It may take a while to upload if your pier is large and/or your internet is slow.
Once you've either uploaded your pier or uploaded your key file as the case may be, you can connect to your server:
ssh riclen-tinlyr
You'll be taken to the shell on your server.
5. Boot your ship
- If you have an existing pier
- If you have a key file
In the previous section you ssh'd into the server. In the same ssh session, extract the pier archive you previously uploaded, then delete the archive:
tar xvzf riclen-tinlyr.tar.gz && rm riclen-tinlyr.tar.gz
You'll now have a folder called riclen-tinlyr, which is your pier. Urbit is best run in a tmux or screen session so it's easy to keep it running when you disconnect. In this case we'll use tmux, which has already been installed by the setup script.
Run tmux:
tmux
You should now be in tmux. First, dock your ship:
./urbit dock riclen-tinlyr
That will copy the urbit runtime inside the pier, so you can now delete the separate binary:
rm urbit
Run the following to allow the runtime to bind ports 80 and 443:
sudo setcap 'cap_net_bind_service=+ep' riclen-tinlyr/.run
Now you can start your ship up with the following:
./riclen-tinlyr/.run -p 34543
After a few moments it'll show the Dojo prompt like ~riclen-tinlyr:dojo>.
6. Get a domain
To make accessing the web interface convenient, you should request an arvo.network domain name. To do so, run the following command in the Dojo, replacing the IP address with your droplet's:
-dns-address [%if .161.35.148.247]
This will request a subdomain of your ship like riclen-tinlyr.arvo.network.
The domain should be registered almost instantly, but sometimes it takes a while for it to propagate to other DNS servers. You might therefore see the following:
> -dns-address [%if .161.35.148.247]dns: request for DNS sent to ~degdns: awaiting response from ~deghttp: fail (13, 504): unknown node or servicehttp: fail (14, 504): unknown node or servicehttp: fail (15, 504): unknown node or servicehttp: fail (16, 504): unknown node or servicehttp: fail (17, 504): unknown node or servicedns: unable to access via riclen-tinlyr.arvo.networkXX confirm port 80XX check via nslookup0
If that happens, wait five or ten minutes and then try again. You should eventually see:
> -dns-address [%if .161.35.148.247]dns: request for DNS sent to ~degdns: awaiting response from ~deg[%key iter=0 width=2.047][%key iter=1 width=2.047][%key iter=2 width=2.047][%key iter=3 width=2.047]acme: requesting an https certificate for riclen-tinlyr.arvo.networkdns: confirmed access via riclen-tinlyr.arvo.network0acme: received https certificate for riclen-tinlyr.arvo.networkhttp: restarting servers to apply configurationhttp: web interface live on https://localhost:443http: web interface live on http://localhost:80http: loopback live on http://localhost:12321
That means the domain has been registered and an SSL certificate has been installed, so you can access the web interface securely with HTTPS.
7. Log in to Landscape
In order to login to the web interface, you need to get the web login code. Run the following in the Dojo:
+code
It'll spit out something like ropnys-batwyd-nossyt-mapwet. That's your web login code, you can copy that and save it in a password manager or similar. Note that the web login code is separate from the master ticket.
The server configuration should now be complete, and you can access Landscape in the browser. Navigate to the domain you configured previously, in this case riclen-tinlyr.arvo.network. You should see the Landscape login screen:
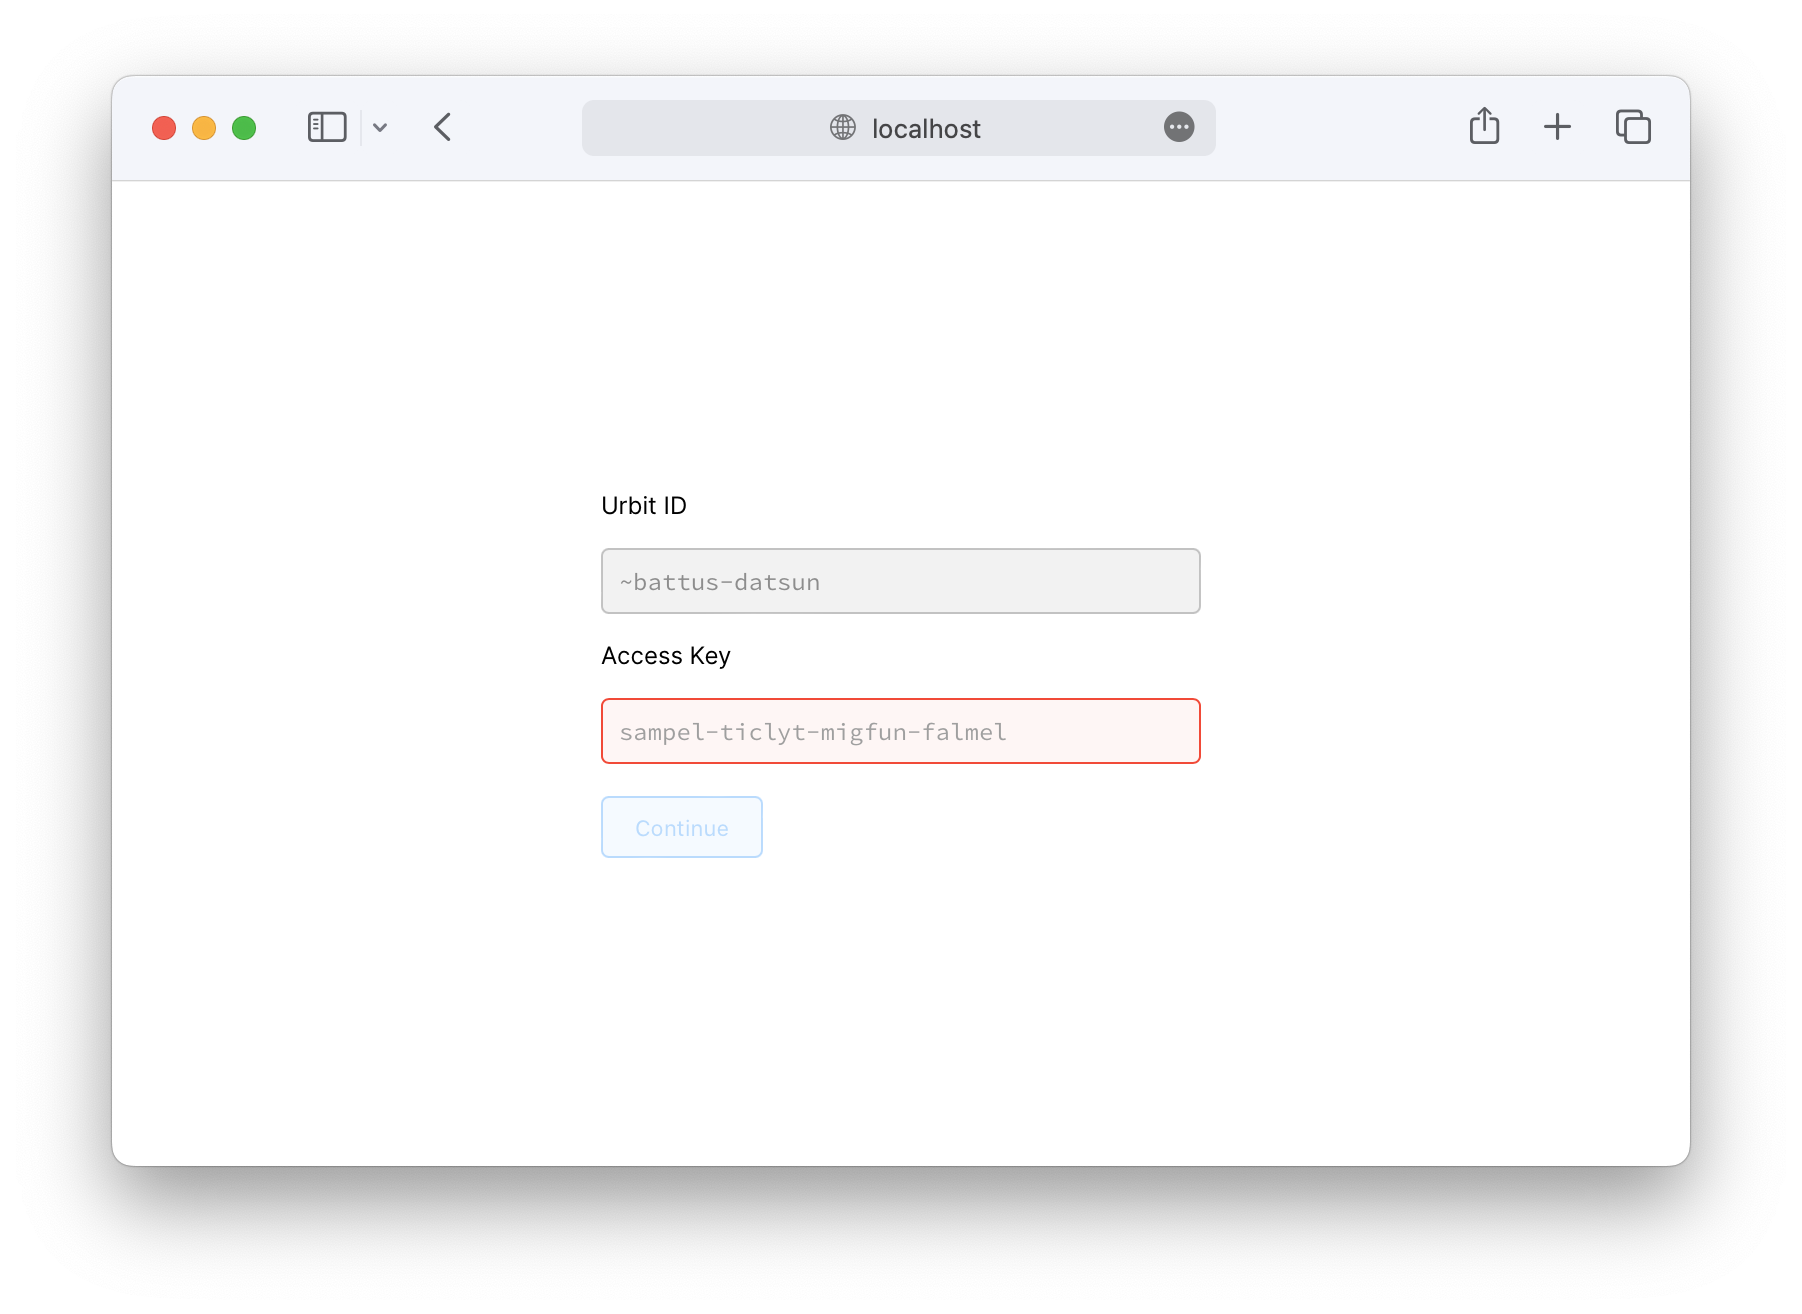
Enter the web login code and you'll be taken to your ship's homescreen. Your ship is now running in the cloud, and you can access it from any device by visiting its URL.
8. Disconnect
You can now disconnect from the tmux session by hitting CTRL+b d (that is, you hit CTRL+b, release it, and then hit d). You'll be taken back to the ordinary shell, but the ship will still be running in the background. If you want to get back to the Dojo again, you can reattach the tmux session with:
tmux a
Finally, you can disconnect from the ssh session completely by hitting CTRL+d.
9. Cleanup
If you booted a new ship by uploading a key file, it's a good idea to now delete the key file on your local machine.
If you uploaded an existing pier, you should delete the old copy of both the pier directory and the .tar.gz archive on your local machine. You might be tempted to keep one of these as a backup, but note that you must never again boot the old copy on the live network. Doing so will create unfixable networking problems and require you to perform a factory reset through Bridge, wiping your ship's data. We therefore don't recommend you keep duplicates of your pier lying around.